
Getting Started with EC-CUBE
Overview
This guide walks you through installing the KOMOJU Payment plugin on EC-CUBE, entering your API credentials, syncing payment methods, configuring webhooks, and running a test payment before going live.
Prerequisites
- A KOMOJU account — sign up here if you don't have one yet
- Live Mode activated on your KOMOJU account
- Admin access to your EC-CUBE store
- Basic familiarity with the EC-CUBE admin panel
This guide assumes your Live Mode application is already approved. If your application is still pending or you haven't applied yet, complete that process first before following this integration guide. See How to Apply for Live Mode (Commercial Use) for more information.
Understanding the EC-CUBE–KOMOJU Integration
KOMOJU for EC-CUBE uses a single plugin that handles all payment methods. You install the plugin once, enter your API credentials, and then sync your available payment methods directly from the plugin settings page.
Here's how a payment works end-to-end:
- A customer reaches the checkout page on your EC-CUBE store
- The payment methods you've enabled appear as options
- The customer selects a method and is redirected to KOMOJU's hosted payment page to complete the transaction
- KOMOJU processes the payment and notifies EC-CUBE via webhook
- The EC-CUBE order status updates automatically
No sensitive payment data (credit card numbers, etc.) passes through your EC-CUBE server. All payment processing happens on KOMOJU's PCI-compliant hosted page.
Installing the Plugin
Step 1: Download the Plugin
Download the latest KOMOJU Payment plugin package (.tar.gz or .zip) from the official release page.
Currently the plugins are available on the releases page of the following repository:
https://github.com/komoju/komoju-eccube/releases
Step 2: Upload and Install via the EC-CUBE Admin Panel
- Log in to your EC-CUBE admin panel
- Navigate to Store → Plugin → Plugin List
- Click Install and upload the plugin archive file
- Once uploaded, click Enable to activate the plugin
After enabling the plugin, a KOMOJU Payment section appears in the left sidebar navigation.
Connecting Your KOMOJU Account
Unlike some integrations that use an OAuth flow, EC-CUBE connects to KOMOJU using API keys that you copy from the KOMOJU dashboard.
Step 1: Get Your API Credentials from KOMOJU
- Log in to the KOMOJU Dashboard
- Navigate to Settings → Your ID and API Keys
- Copy the following three values:
- Merchant ID — your account identifier
- Secret Key — used for server-side API calls
- Publishable Key — used for frontend token generation
Step 2: Enter Credentials in EC-CUBE
- In your EC-CUBE admin panel, navigate to KOMOJU Payment → Settings
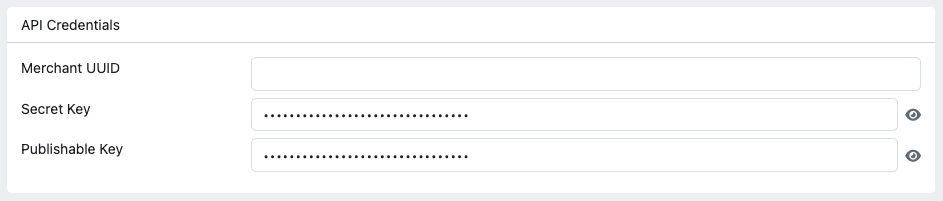
- In the API Credentials card, enter your Merchant UUID, Secret Key, and Publishable Key
- Click Save at the bottom of the page
Step 3: Sync Payment Methods
After saving your credentials, click the Refresh payment methods button. The plugin will fetch your available payment methods from your KOMOJU account and display them as badges on the settings page.
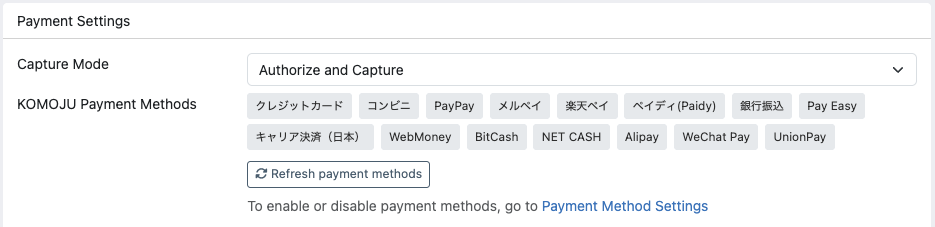
The payment methods shown depend on which methods are enabled in your KOMOJU account.
Step 4: Link Payment Methods to Delivery Methods
Each KOMOJU payment method is registered as a separate payment option in EC-CUBE. For customers to see them at checkout, each payment method must be linked to at least one delivery method.
- Navigate to Settings → Store Settings → Delivery settings
- Edit each delivery method and ensure the KOMOJU payment methods are checked under the available payment options
- Save the delivery method settings
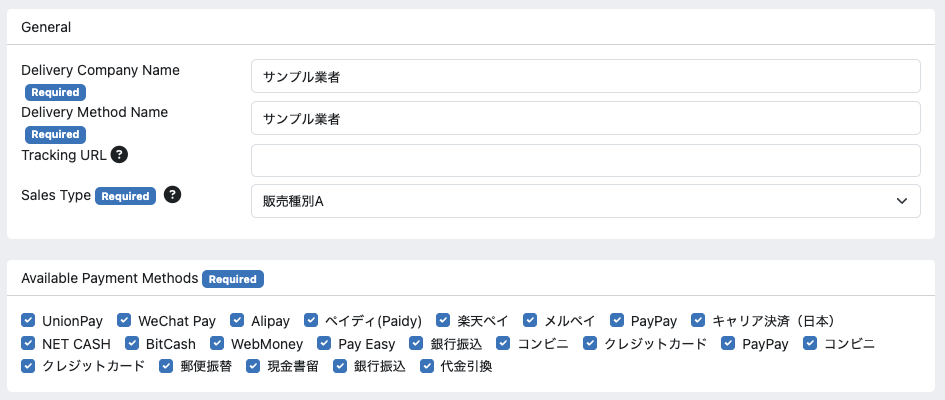
If a KOMOJU payment method is not linked to any delivery method, it will not appear as an option at checkout — even if it is enabled in the plugin settings.
Configuring Webhooks
Webhooks allow KOMOJU to notify your EC-CUBE store when payment events occur (captures, refunds, cancellations, etc.). Without webhooks, your order statuses will not update automatically.
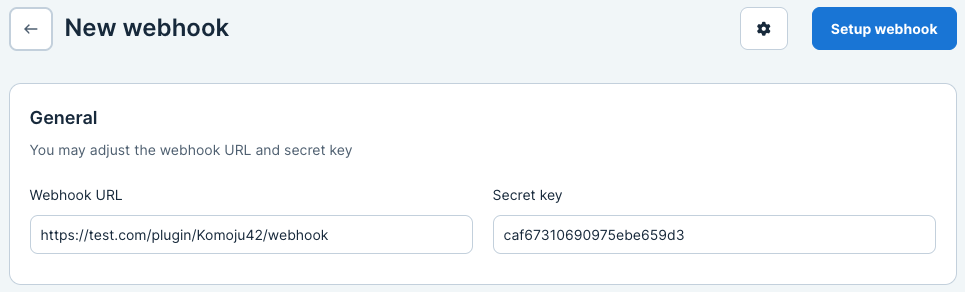
Step 1: Copy the Webhook URL and Secret
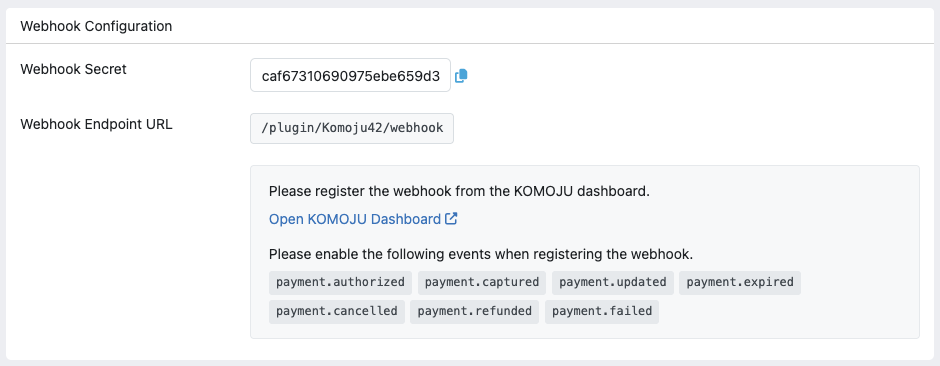
On the KOMOJU Payment → Settings page, the Webhook Configuration card displays:
- Webhook Secret — click the copy button to copy this value
- Webhook Endpoint URL — the URL that KOMOJU will send events to
Step 2: Register the Webhook in the KOMOJU Dashboard
- Go to the KOMOJU Dashboard
- Navigate to Manage → Webhook
- Add a new webhook using the endpoint URL and secret copied from EC-CUBE
- Enable the following events:
payment.capturedpayment.refundedpayment.cancelledpayment.expiredpayment.failedpayment.updatedpayment.authorized

All events listed above are required for the plugin to function correctly. Missing events may cause order statuses to fall out of sync.
Setting the Capture Mode
The plugin supports two capture modes, configurable from the Payment Settings card on the settings page:
- Authorize and Capture — payments are captured immediately when the customer completes checkout. This is the default and recommended setting for most stores.
- Authorize Only — payments are authorized but not captured until you manually capture them from the order detail page in the EC-CUBE admin panel. This is useful if you need to verify inventory or confirm orders before collecting payment.
When using Authorize Only mode, you must manually capture each payment from the order detail page. Uncaptured payments will eventually expire depending on the payment method.
Payment methods that do not support manual capture will automatically be captured regardless of the setting enabled.
Testing Your Integration
Before going live, verify that the full payment flow works correctly.
Step 1: Switch to Test Mode
In the KOMOJU Dashboard, switch to Test Mode and copy the Test Mode API credentials (Merchant UUID, Secret Key, Publishable Key). Enter these test credentials in the EC-CUBE KOMOJU settings page and save.
Step 2: Place a Test Order
Open your store's checkout as a customer would and complete a payment using one of your enabled methods. KOMOJU provides test pages for most payment methods to simulate a payment.
For testing credit cards, review the following page for sample test card numbers: Test Inputs
Step 3: Verify in Both Dashboards
After completing the test payment, confirm it appears in:
- EC-CUBE Admin → Orders — the order should show with an updated status
- KOMOJU Dashboard → Payments — the payment should be listed with a completed or authorized status
Remember to switch back to your Live Mode API credentials before your store goes live. There is no visual indicator on the checkout page telling customers they are in test mode.
Going Live
When you're ready to accept real payments:
- Go to the KOMOJU Dashboard and switch to Live Mode
- Copy your Live Mode API credentials
- Enter the Live Mode credentials on the KOMOJU Payment → Settings page in EC-CUBE
- Click Save, then click Refresh payment methods to sync your live payment methods
- Verify that webhooks are registered for your Live Mode environment
What You Learned
- Installed and enabled the KOMOJU Payment plugin on EC-CUBE
- Entered your API credentials and synced payment methods from KOMOJU
- Linked payment methods to delivery methods so they appear at checkout
- Registered webhooks in the KOMOJU Dashboard for automatic order status updates
- Configured the capture mode for your store
- Ran test payments and verified the integration in both dashboards
- Switched to Live Mode to accept real customer payments