
Using Payment Links
A no-code solution to selling your product or service
Payment Links is a new feature!If you have any suggestions to help us improve the feature, please share with us via this survey!
This guide shares the best practices for getting the most value from KOMOJU's Payment Links.
1. (recommended) Customize the checkout page for Payment Links
Since your customers will be directed to KOMOJU's Hosted Page to complete the checkout after clicking your Payment Link, our system empowers you to customize the theme of the Hosted Page in order to provide a holistic customer experience.
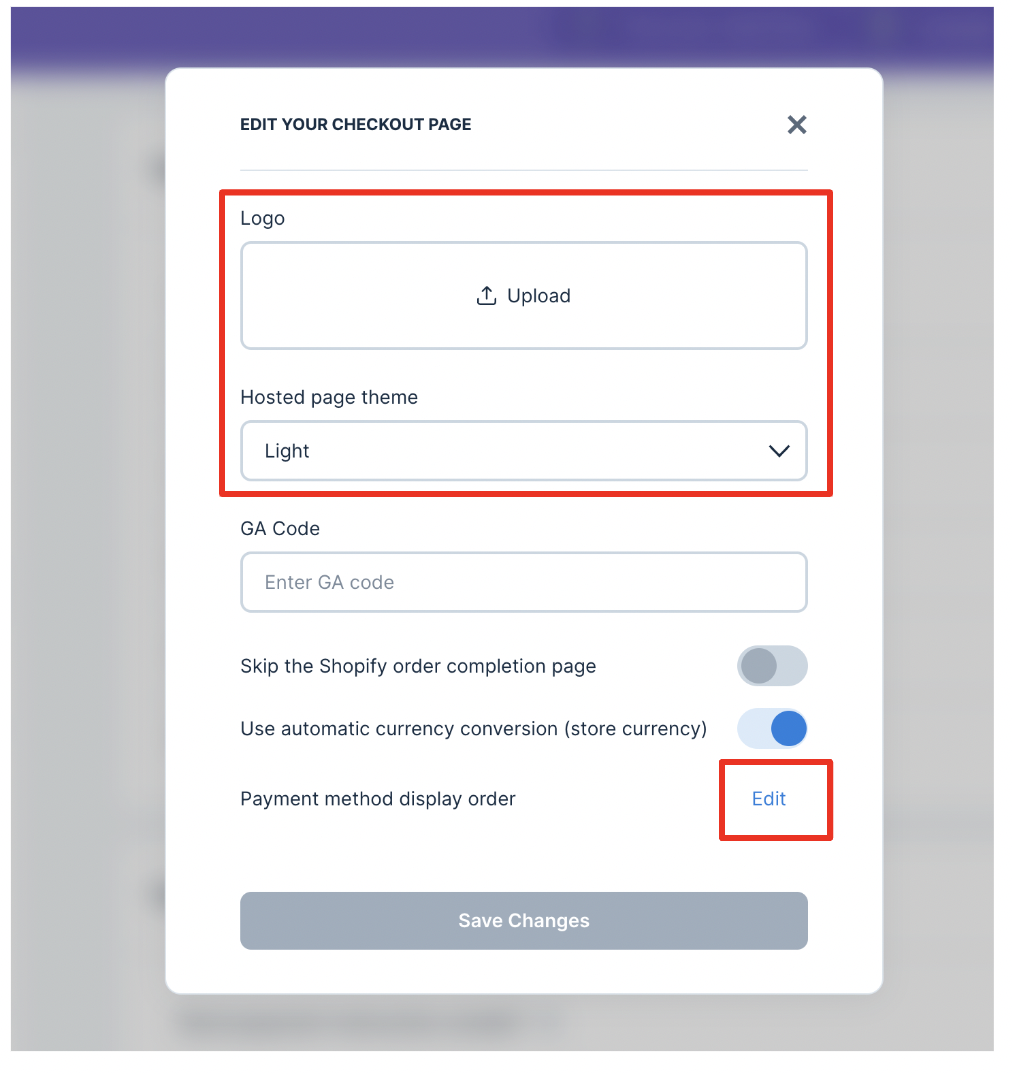
Recommended Hosted Page customizations:
- Upload your logo
- Set up the theme (Light or Dark)
- Adjust the payment method display order based on the preference of the majority of your customers
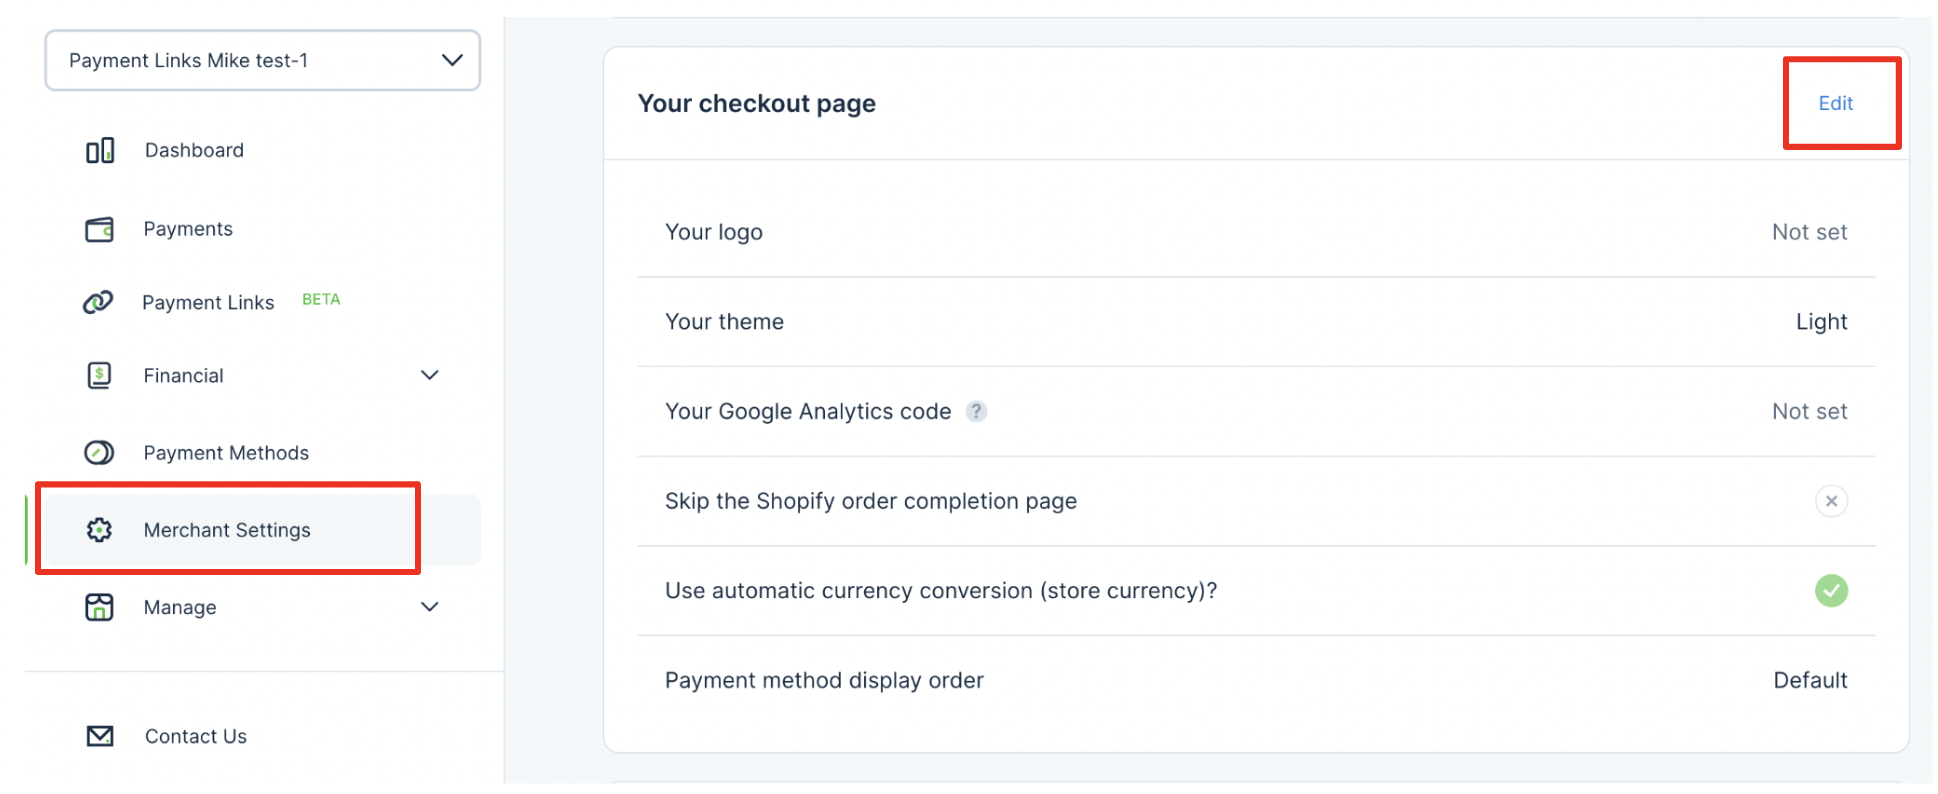
How to access customization settings:
- Access KOMOJU Merchant Dashboard
- Select "Merchant Settings" on the left-side navigation bar
- Click "Edit" button in the "Your checkout page" section
2. (recommended) Configure the email settings
If you do not have a page or a notification system to allow your customers to check their payment conditions, you can leverage KOMOJU's email notification function. Learn more
If you add attachments to Payment Links, you should at least enable the Payment Receipt emails, as they will contain links to these attachments. Otherwise, your customers won't be able to re-download the attachments post-payment.
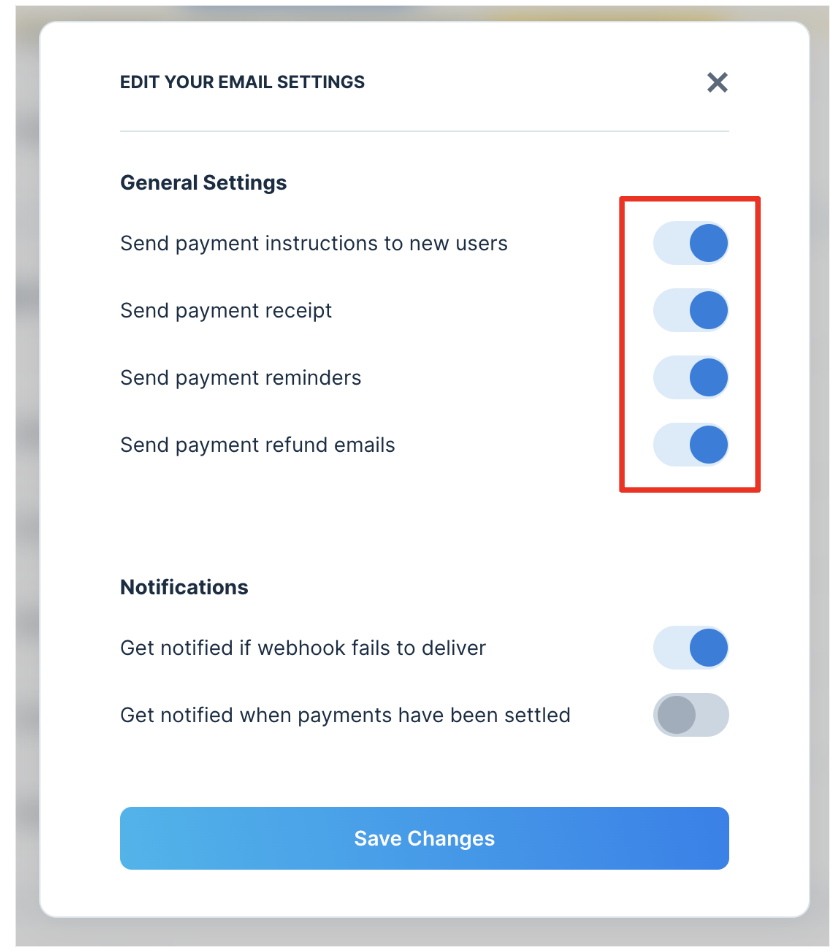
Recommended practice:
- Keep "Send payment instructions" ON
- This is essential for customers to complete checkout when using some payment methods
- Turn "Send payment receipt", "Send payment reminders" and "Send payment refund emails" ON
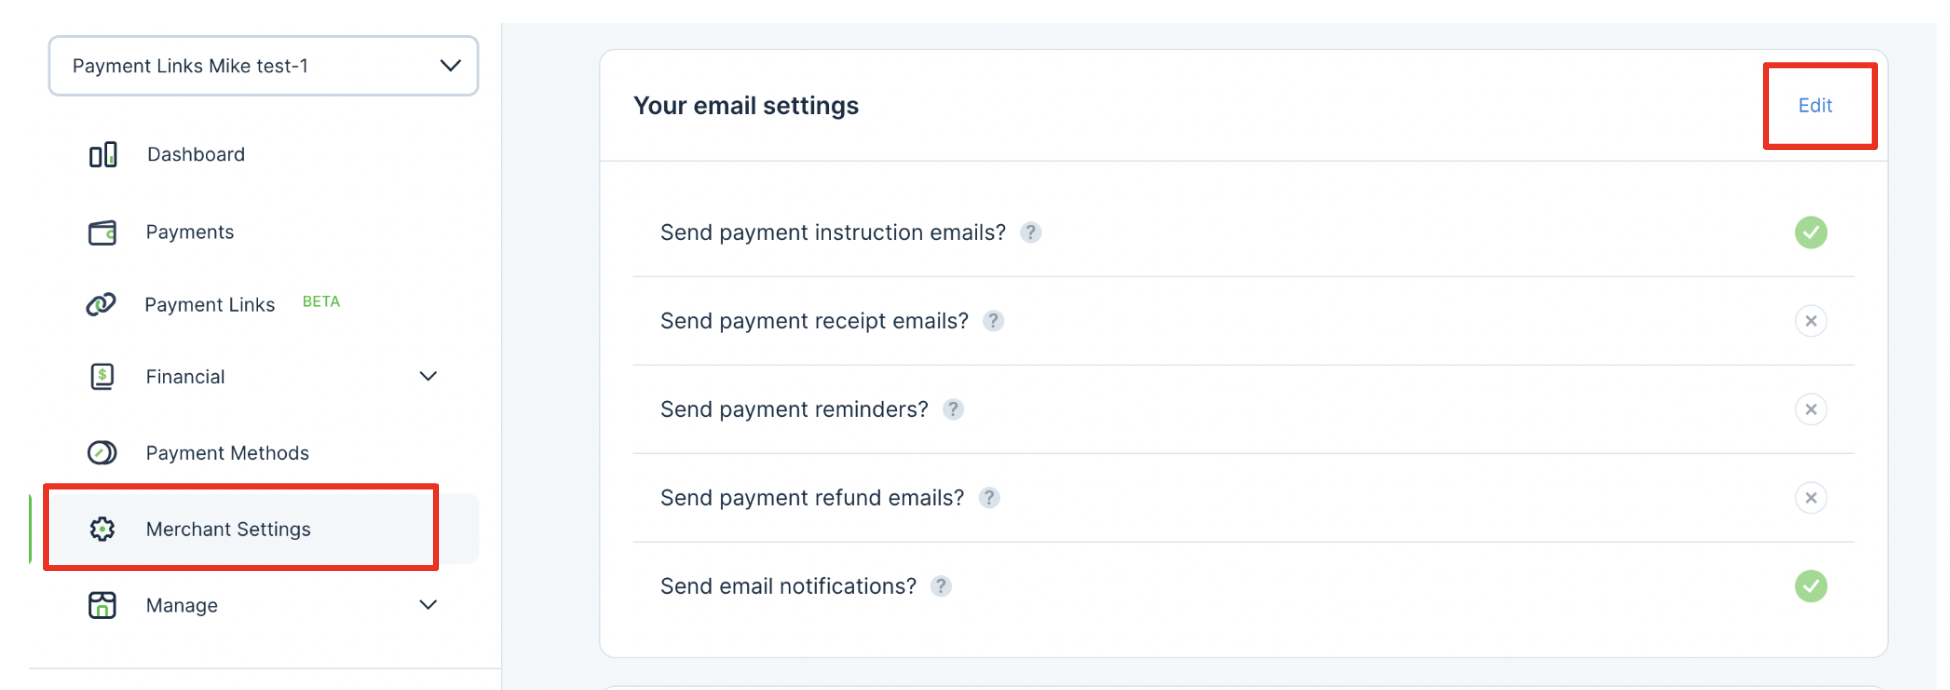
How to access these settings:
- Access the KOMOJU Merchant Dashboard
- Select "Merchant Settings" on the left-side navigation bar
- Click the "Edit" link in the "Your email settings" section
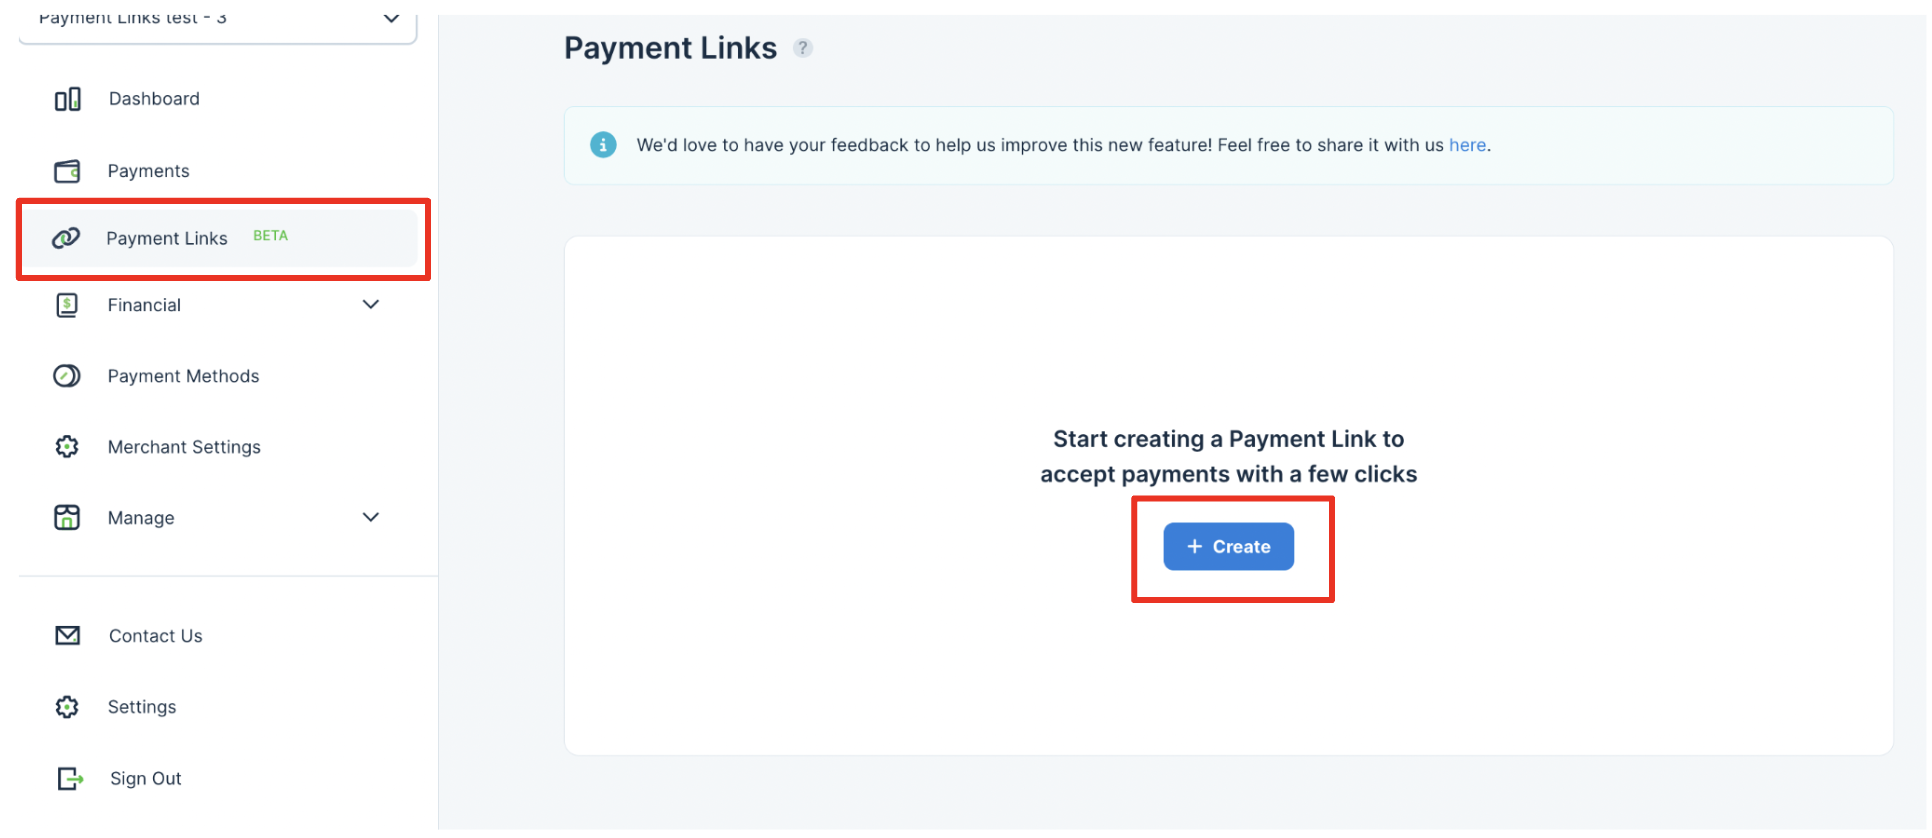
3. Create a new Payment Link
Now, you've completed the preparations and are ready to create a Payment Link for each product/service. Also, there's no upper limit regarding the number of Payment Links.
It'll provide your customers best checkout experience with a succinct title, description, and a clear image.
How to start creating a new Payment Link:
- Access KOMOJU Merchant Dashboard
- Click "Payment Links" on the left-side navigation bar
- Click "Create new link" button
4. Share a Payment Link
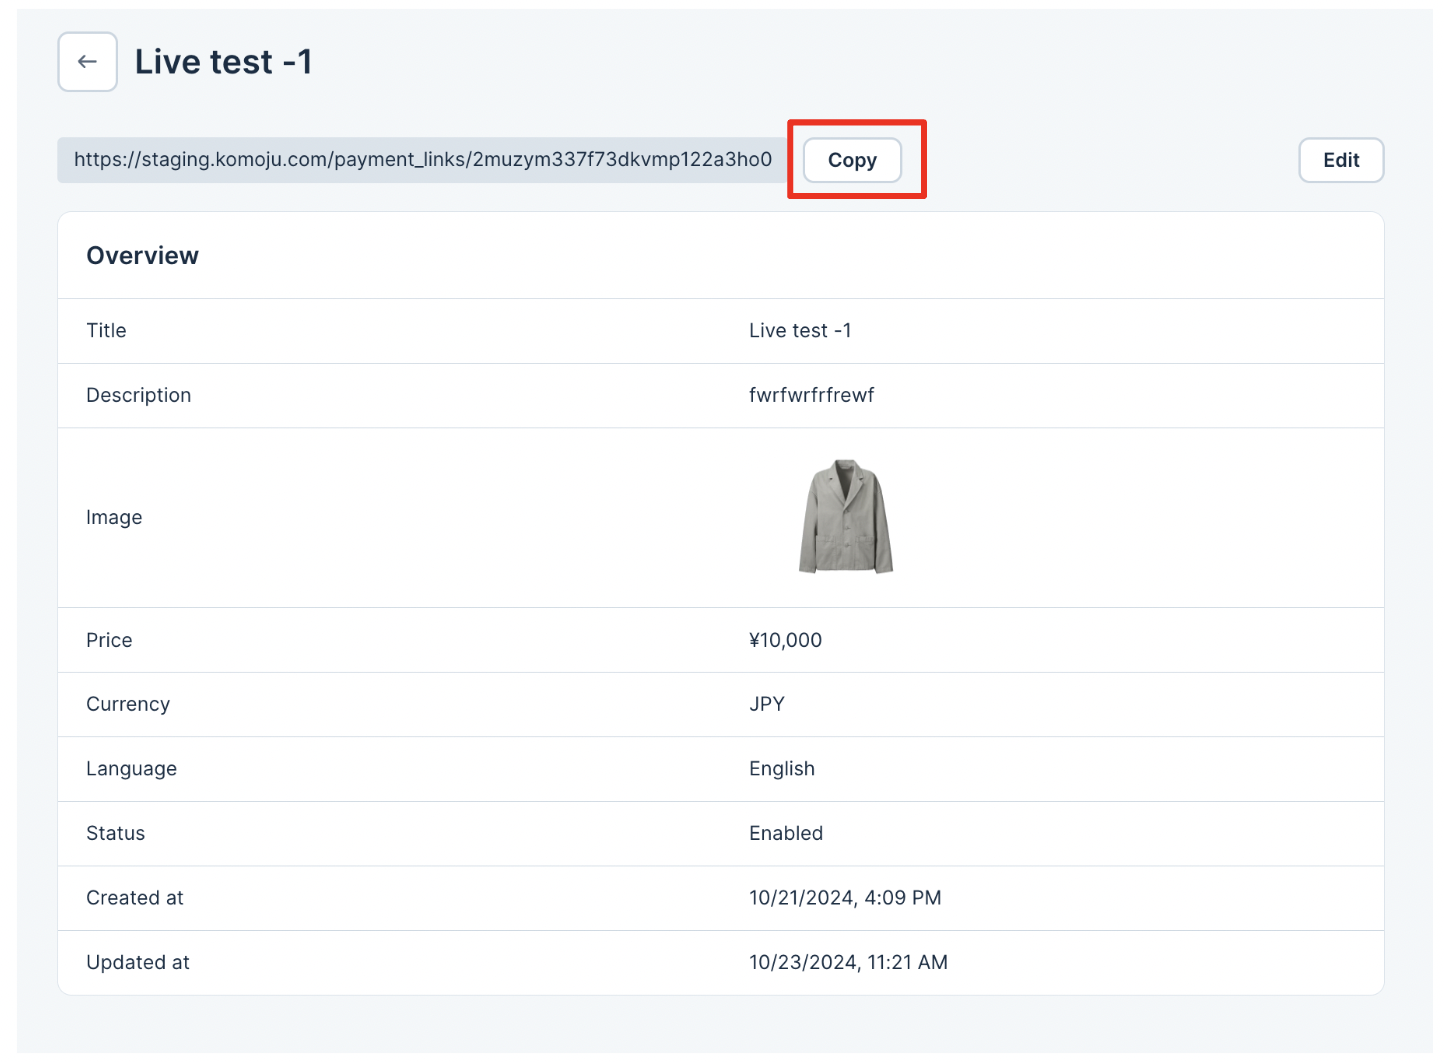
After creating a Payment Link, you'll be able to copy the Payment Link's unique URL and share it with your customers via various sales channels, such as your website, social media, digital ads, emails, text messages...etc.
How to access the URL:
-
Select a Payment Link
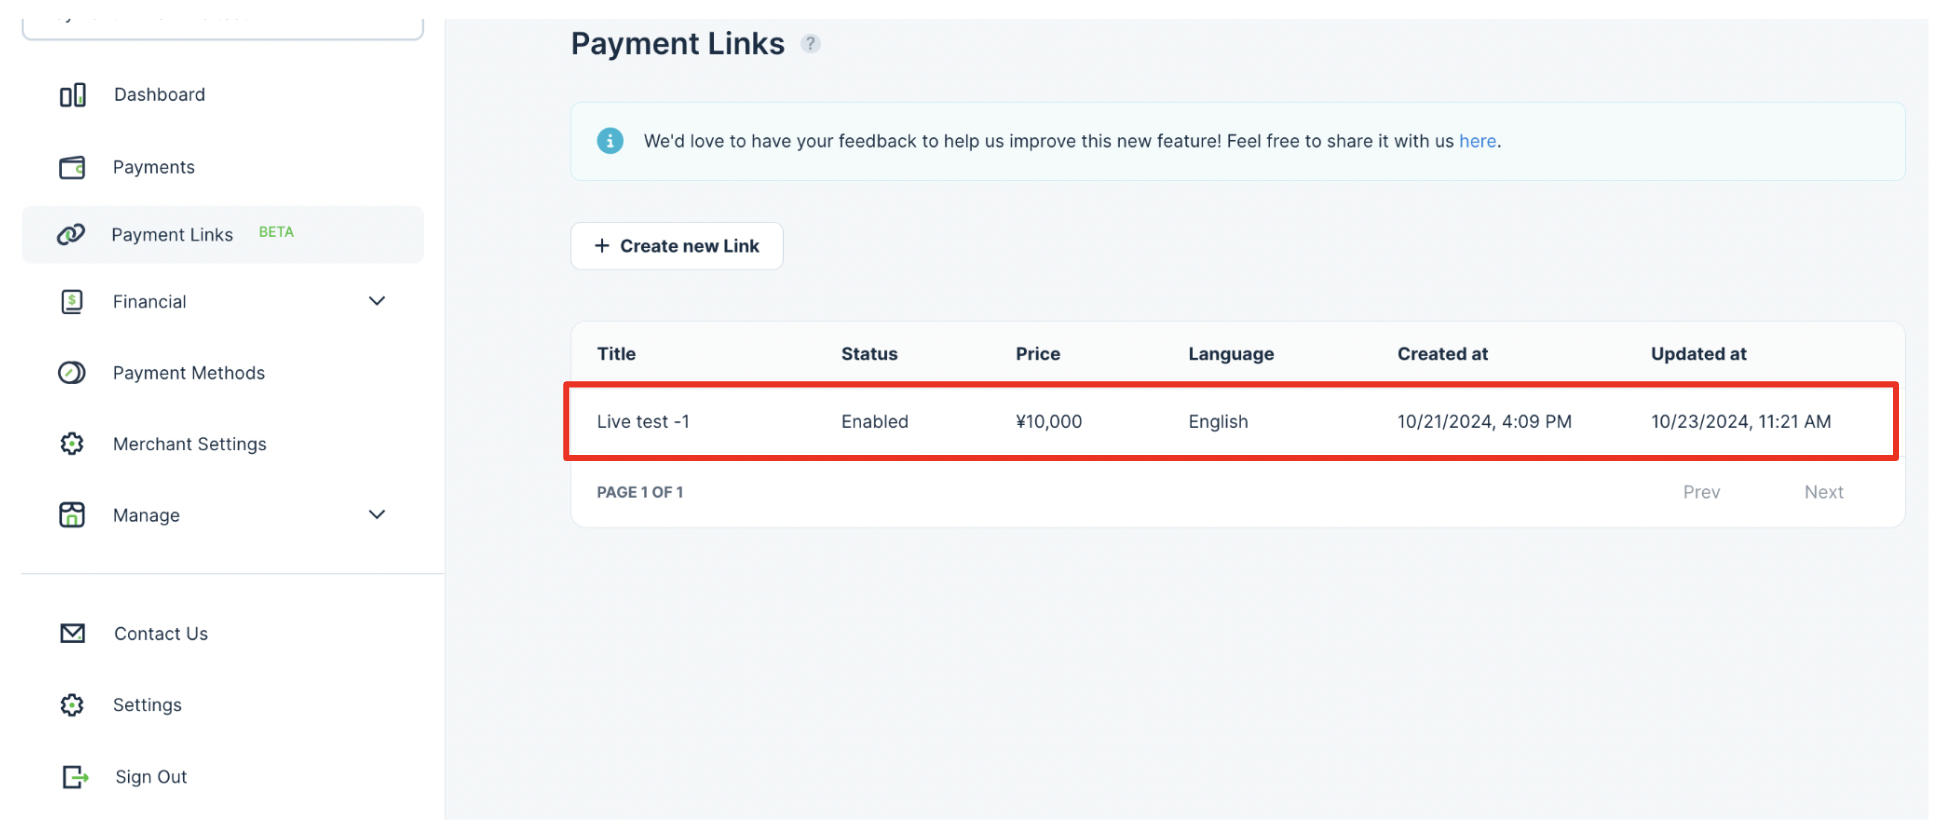
-
Click the "Copy" button to retrieve the URL
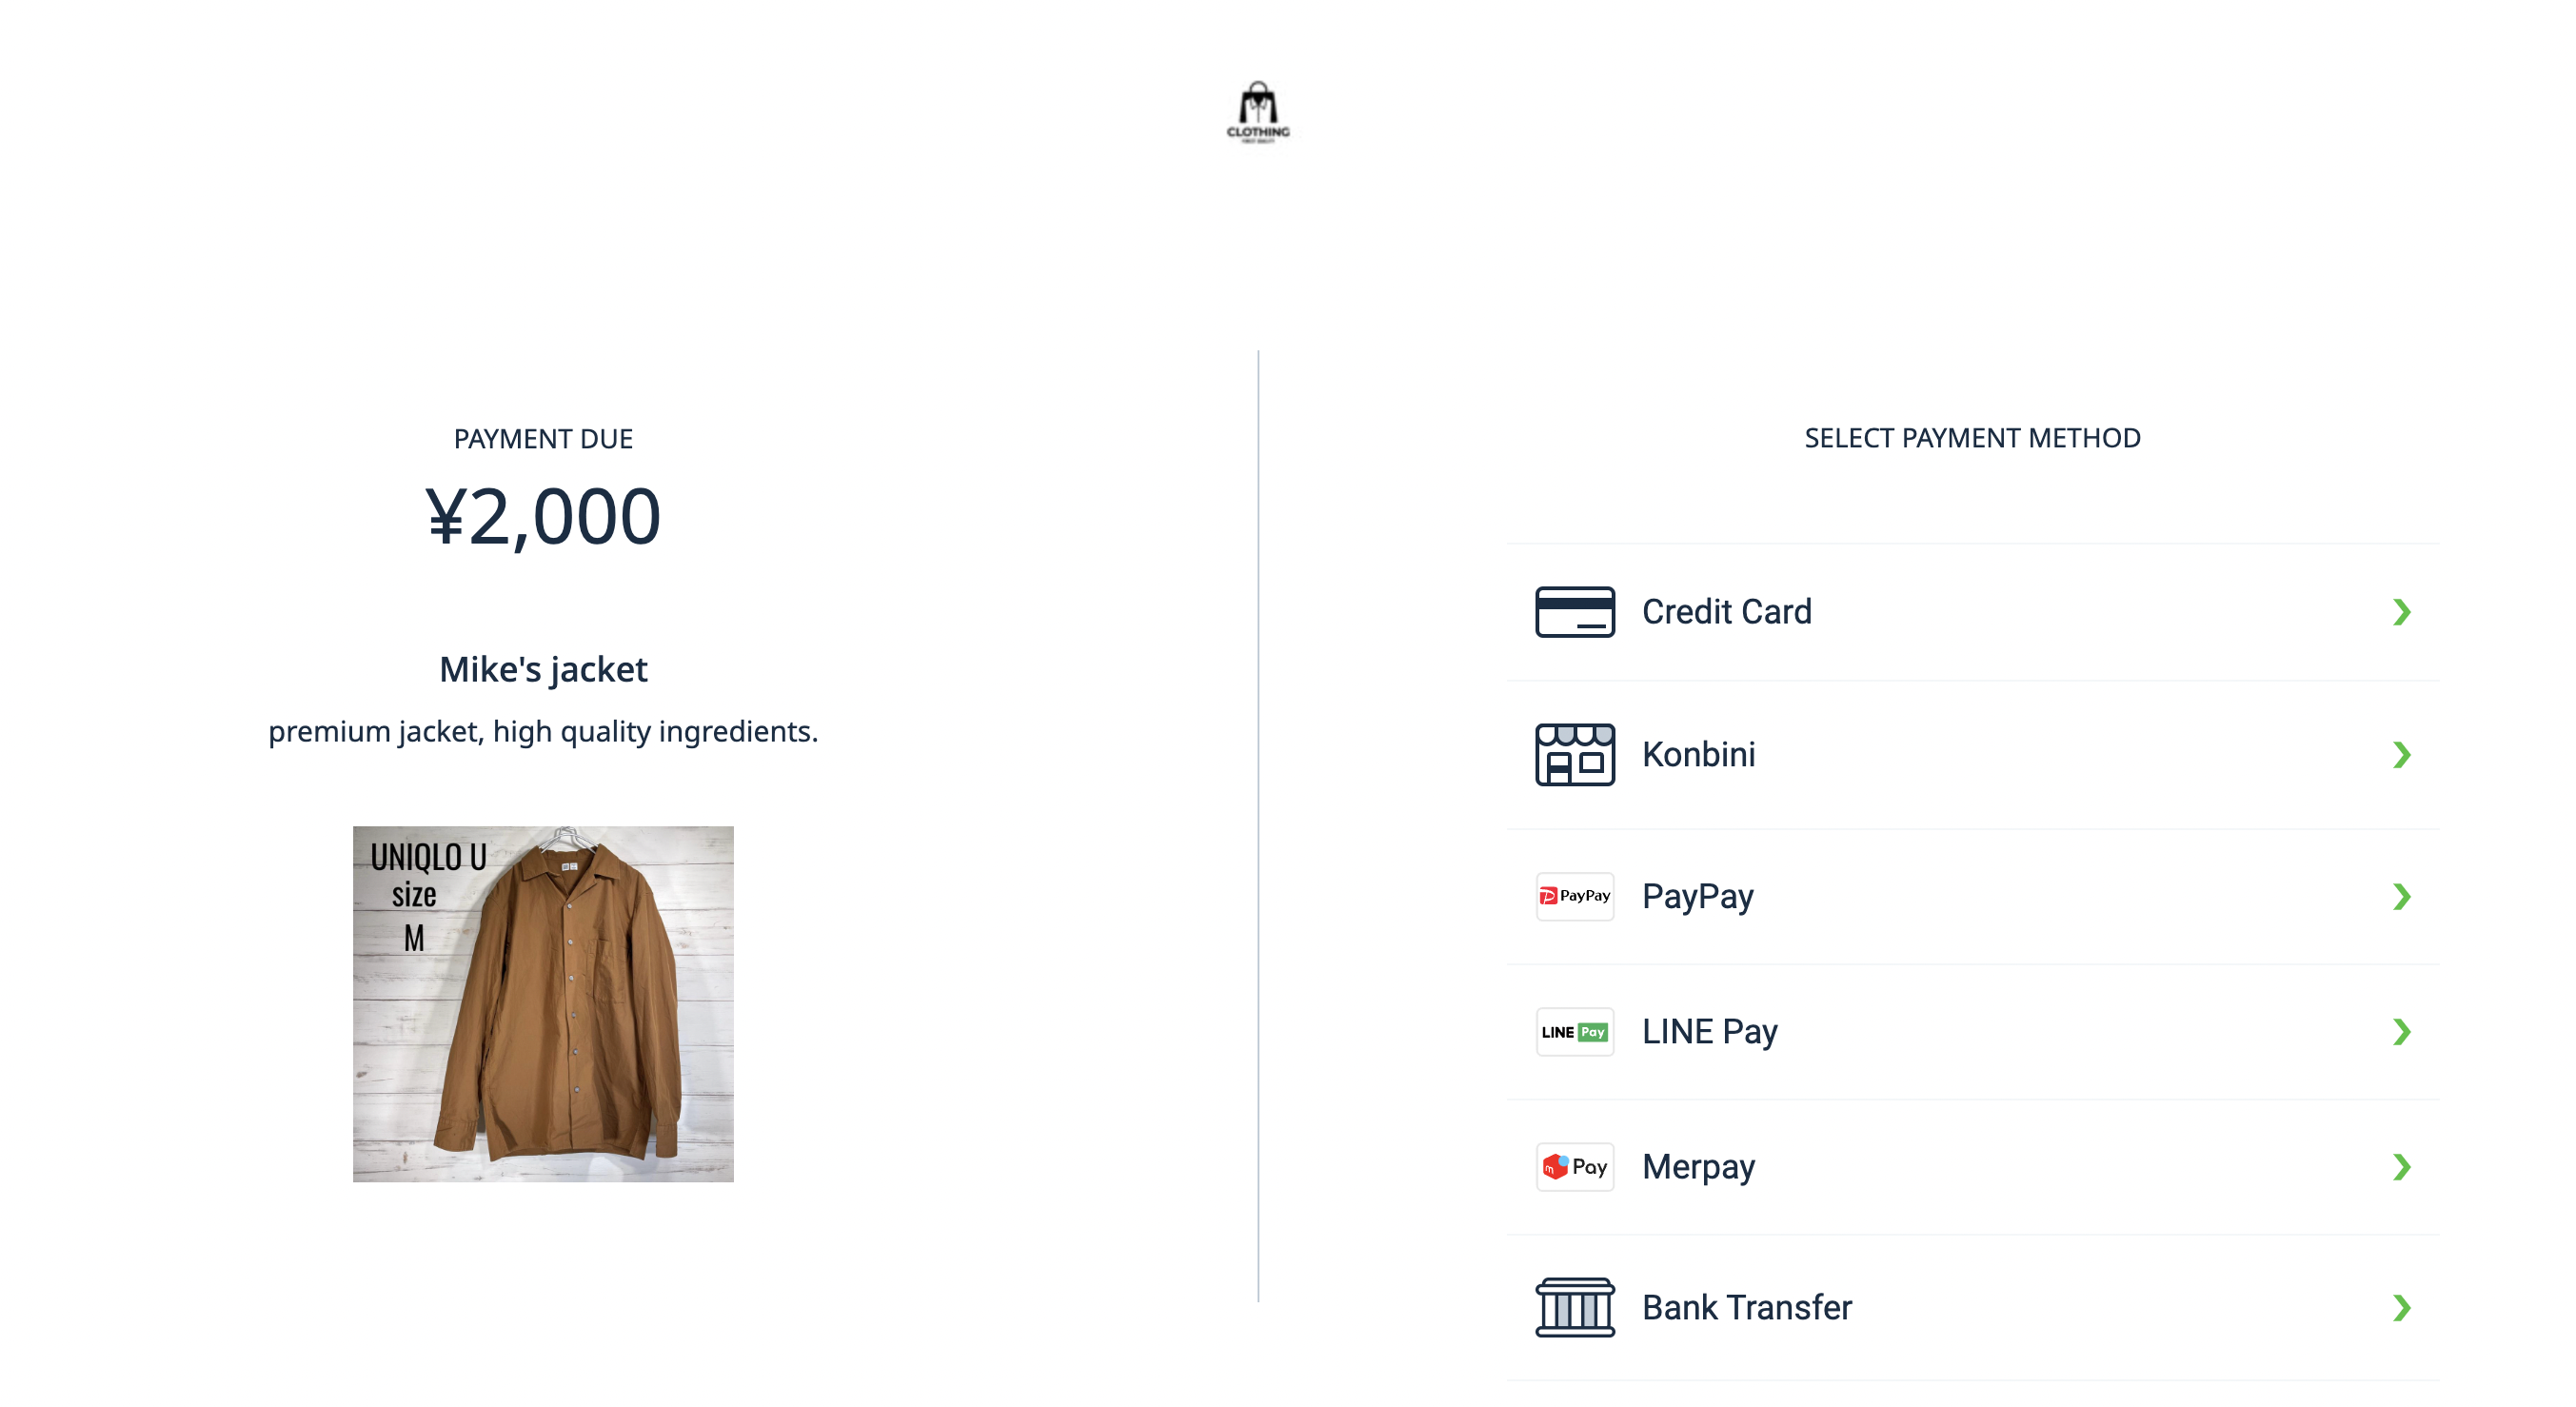
5) Customers complete checkout
Once customers receive and click your link, they will be directed to KOMOJU's Hosted Page, where they can choose from various payment methods to complete the checkout.
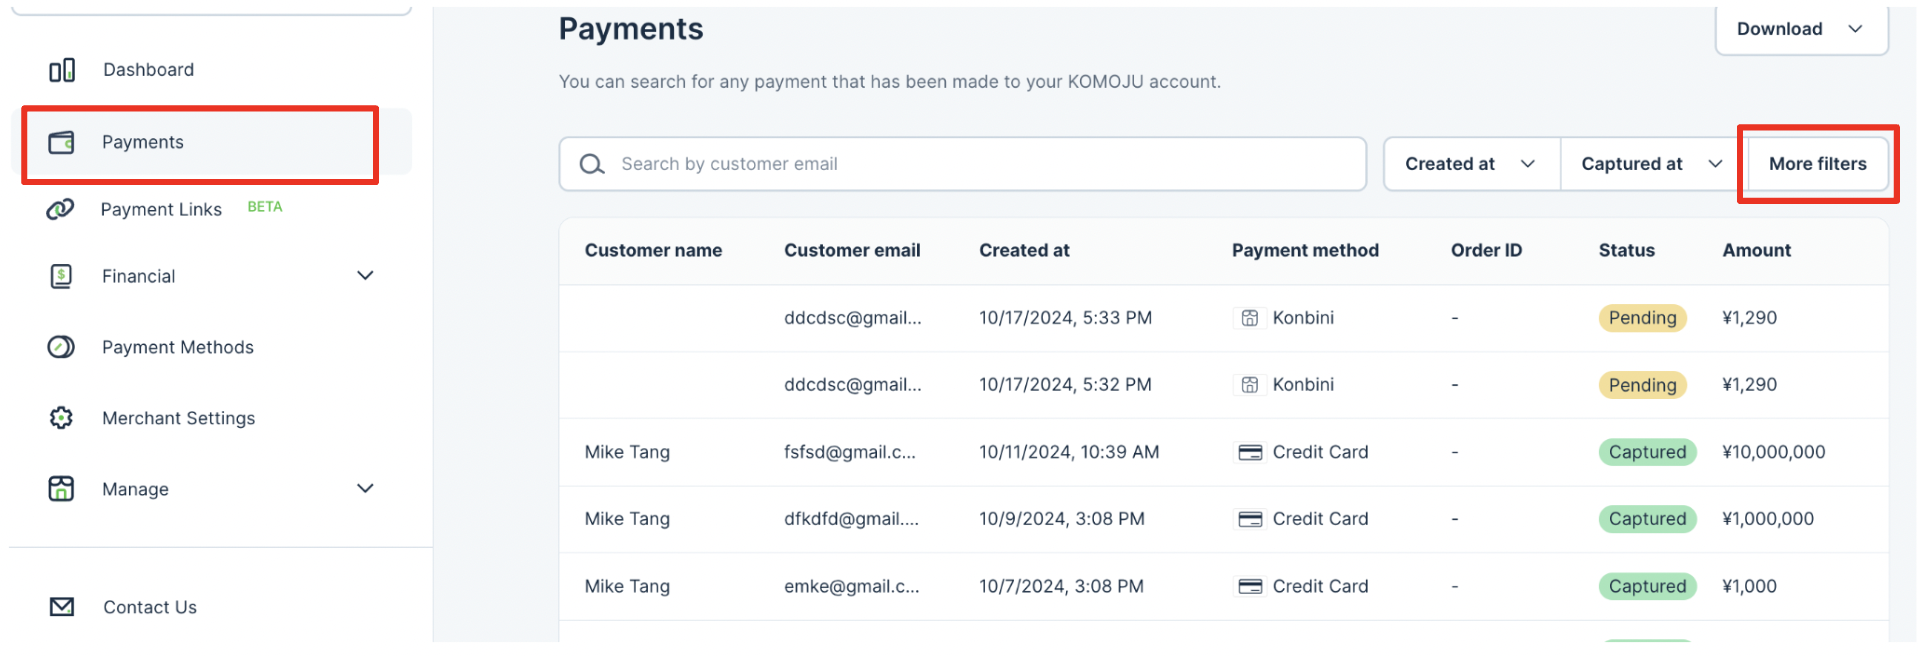
6. Track payments created via a Payment Link
Once your customer completes checkout via KOMOJU Hosted Page, you'll be able to check the corresponding payments on the dashboard. You can filter payments by their associated Payment Link.
How to filter payments by Payment Link:
-
Access KOMOJU Merchant Dashboard
-
Select "Payments" on the left-side navigation bar
-
Click "More filters"
-
Select a Payment Link
Updated 4 months ago