
Using Apple Pay (Hosted Page/Fields)
Introduction
Apple Pay is a safe, reliable, and high success rate payment method that is extremely popular in Japan and abroad. Additionally, it can be quite simple to implement via KOMOJU. At this stage, KOMOJU only supports Apple Pay via Visa and Mastercard branded cards registered in the end user's Apple Wallet. Only JPY payments are supported.
To find out whether you are eligible to use Apple Pay via KOMOJU, please refer to this page.
Hosted Page
Once onboarded to Apple Pay, if you use the KOMOJU Hosted Page, you can simply add the apple_pay payment type to your session creation payment_types. This is all that is needed!
This will allow the end user to pick Apple Pay from the list of possible payment methods.
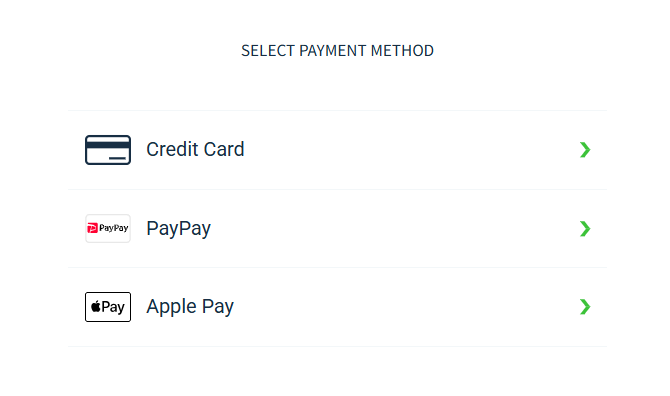
If you create a session with only Apple Pay as a payment method, the user will immediately get the familiar, Apple-branded "Pay with Apple Pay" button.

We also have special handling should you create a session with just Apple Pay and Credit Card, where the end user is given the choice on a single page, rather than via an upstream payment selection dialogue. This can be very powerful and increase payment success rate.
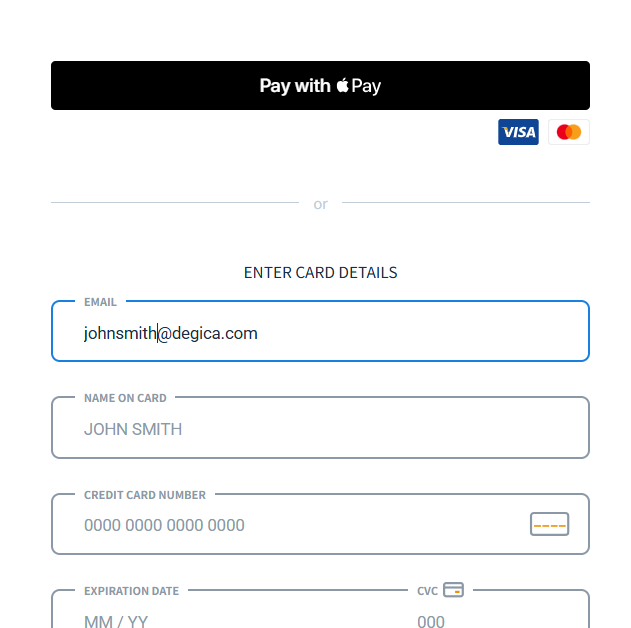
Hosted Fields
To use Apple Pay with Hosted Fields, you will need to create a session in the same way as described in the above "Hosted Page" section. Additionally, because you will be hosting the fields within a page that is in your own domain, you need to register your domain with Apple. We have provided an easy interface to do so.
-
Download the Apple Domain Association file
-
Place the file at the following path, within your domain and any other subdomains you may place hosted fields under:
/.well-known/apple-developer-merchantid-domain-association -
The file must have Content-Type: text/plain in the header, be externally accessible, not be password protected, not be behind a proxy or redirect. Example of a file hosted correctly: https://komoju.com/.well-known/apple-developer-merchantid-domain-association
-
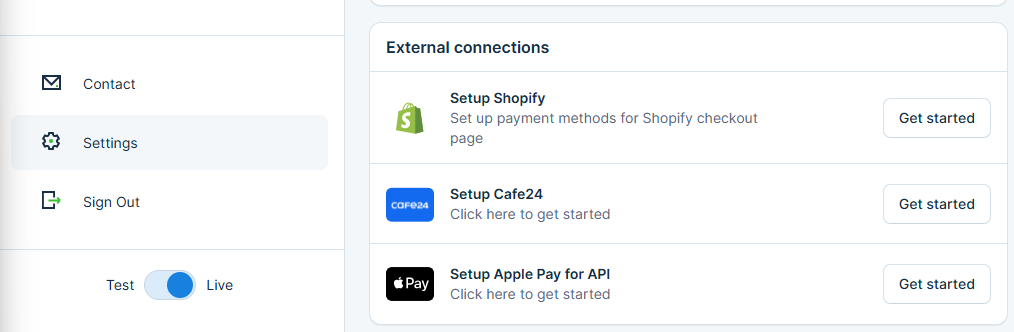
Log into your KOMOJU Dashboard, and navigate to "Settings" on the left-hand bar. Then scroll down to "External Connections" and click on "Get Started" next to "Setup Apple Pay for API"
-
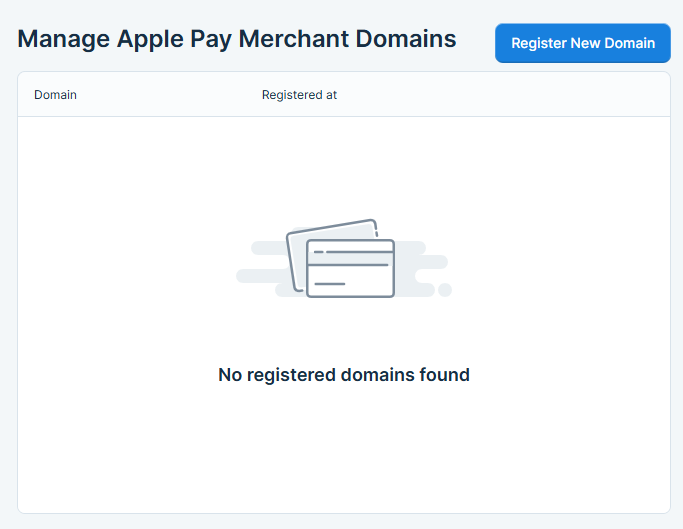
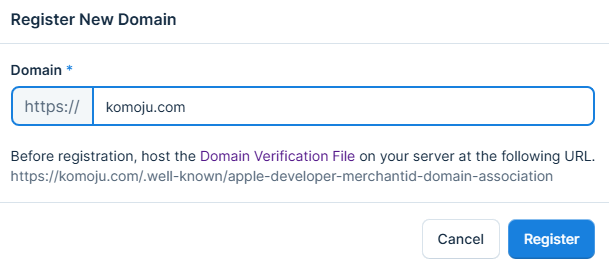
In the following page, click on "Register New Domain"
-
Input your full domain or subdomain name and click register
-
The domain appears in the list as registered

-
Repeat steps 2-7 for each domain or subdomain you will be using Apple Pay from
Once the above is done, you will be able to accept Apple Pay payments via Hosted Fields. Simple use the apple_pay slug when creating the Session for your Hosted Fields.
Updated 7 months ago