
Integration Guide: Payment
How to accept payments with the KOMOJU Hosted Page
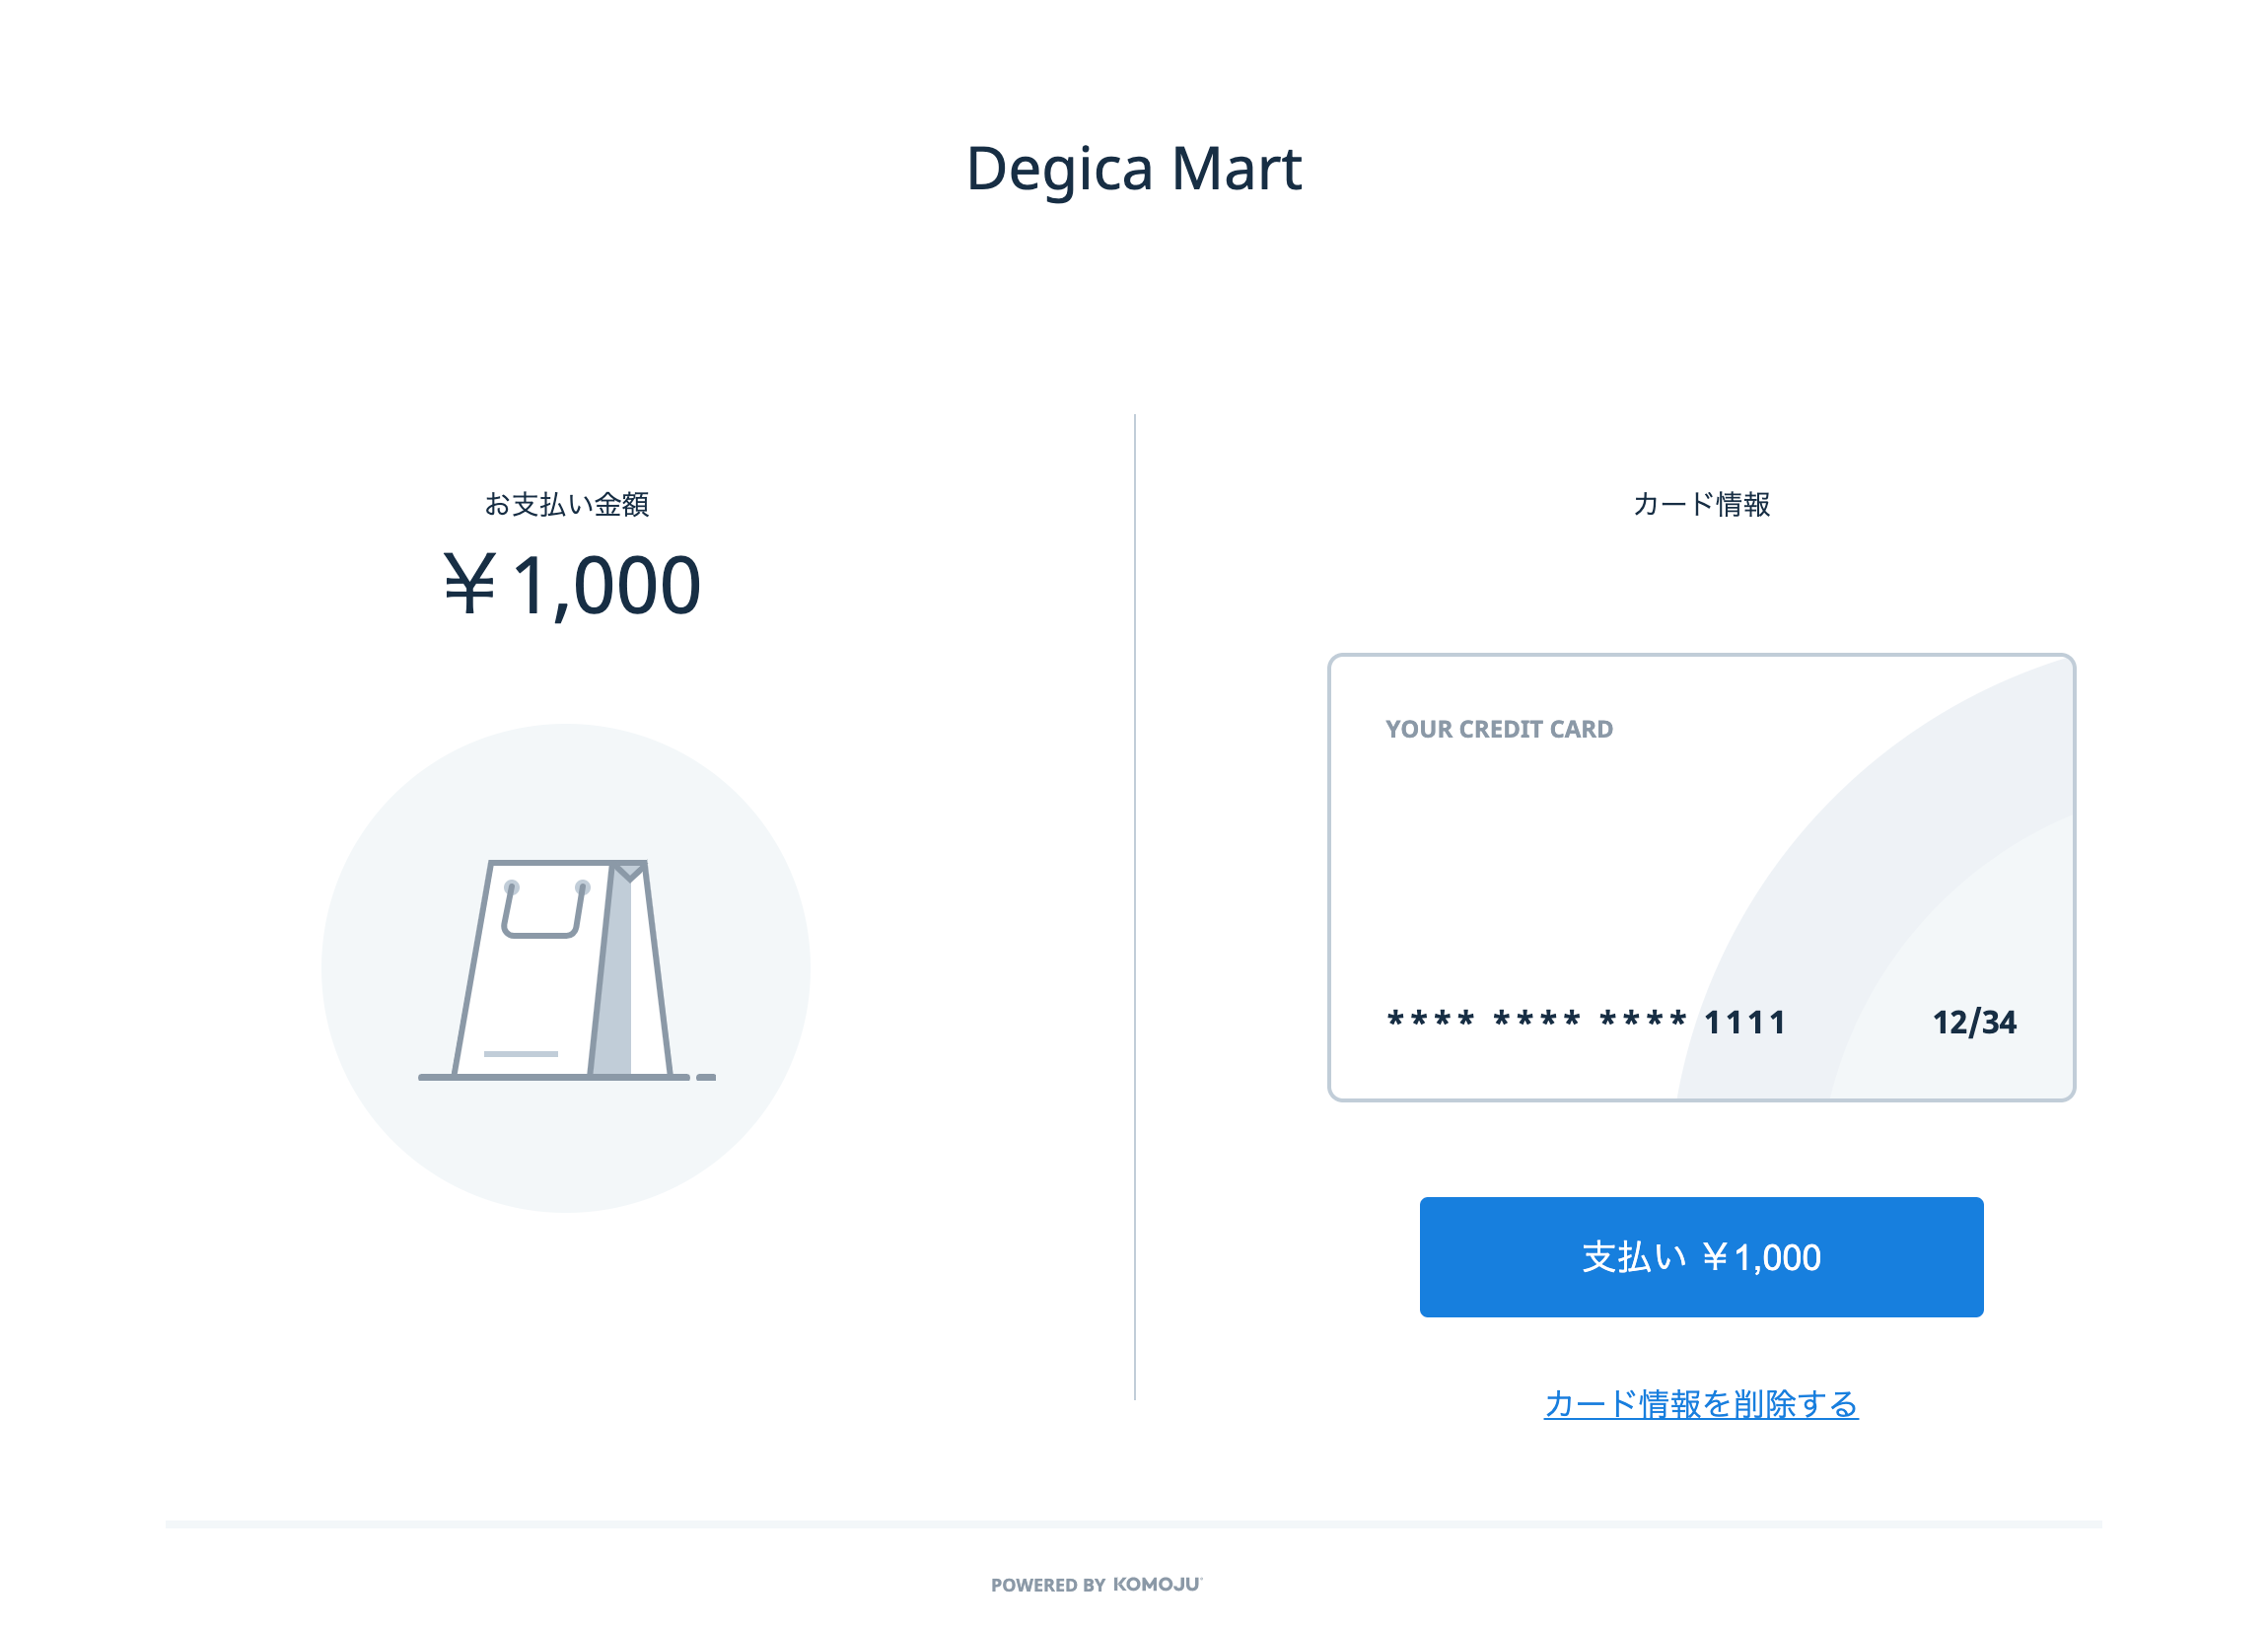
Creating payments with our hosted page is simple and never requires PCI-DSS compliance on your part.
The flow goes something like this:
- Your server creates a Session, specifying a
return_url - Your app redirects your customer to the Session's
session_url - Once payment is completed or aborted, customer is sent to your
return_urlwith asession_idquery param appended - Your server uses the
session_idquery param to determine payment status

Code example
Here is example server code for using the KOMOJU Hosted Page to accept payments.
import fetch from 'node-fetch'
import express from 'express'

const app = express()

const secretKey = 'PASTE YOUR SECRET KEY HERE'

/*
 * When your customer is ready to pay, create a session and redirect to the session URL.
 */
app.get('/', async (req, res) => {
  const session = await fetch('https://komoju.com/api/v1/sessions', {
    method: 'POST',
    headers: {
      'Content-Type': 'application/json',
      'Authorization': `Basic ${btoa(secretKey + ':')}`,
    },
    body: JSON.stringify({
      amount: 1000,
      currency: 'JPY',
      return_url: req.protocol + '://' + req.get('host') + '/return',
    })
  }).then(r => r.json())

  console.log(session)

  res.redirect(session.session_url)
})

/*
 * When the customer is done, they will be redirected to the return URL you specified above.
 */
app.get('/return', async (req, res) => {
  const sessionID = req.query['session_id']
  const session = await fetch(`https://komoju.com/api/v1/sessions/${sessionID}`, {
    method: 'GET',
    headers: {
      'Authorization': `Basic ${btoa(secretKey + ':')}`,
    },
  }).then(r => r.json())

  console.log(session)

  if (session.status === 'completed') {
    res.send('Thanks! Your payment is ' + session.payment.status)
  } else {
    res.send("Sorry! You must've had trouble paying.")
  }
})

app.listen(3000, () => console.log('Listening on port 3000'))
In-depth example
Here is a more detailed breakdown of what's going on in the previous section.
Step 1: Create a Session
We first need to use the KOMOJU Sessions API to create a payment session. The request looks something like this:
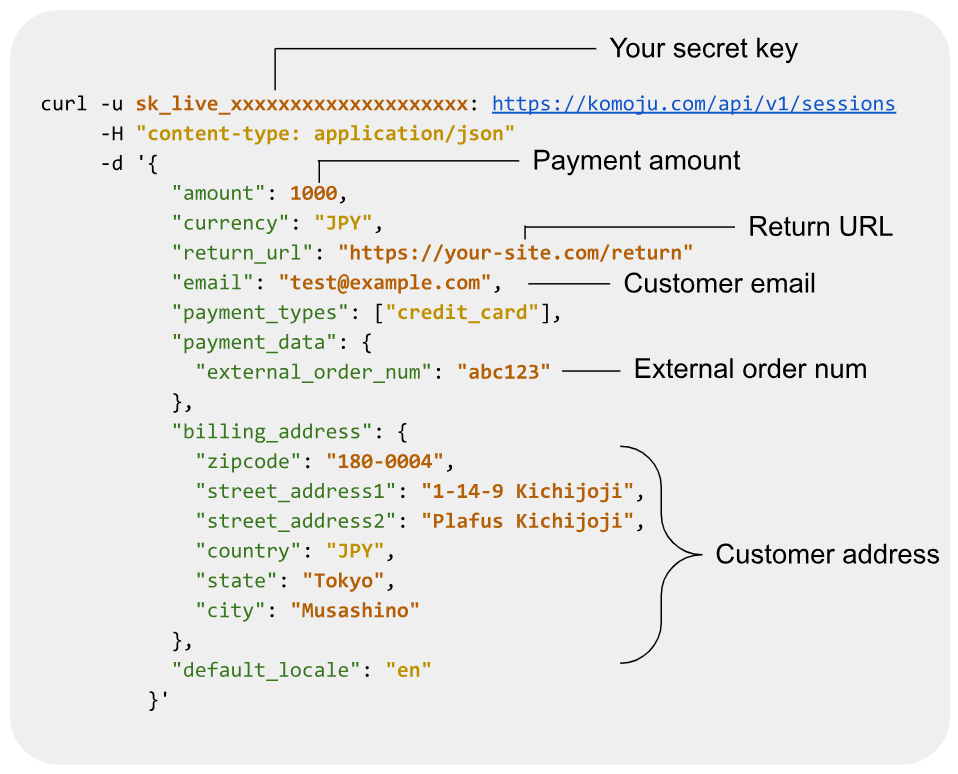
The above Session will only support credit card payments (due to ”credit_card” in payment_types). For details on the available Payment Types, as well as fields and their purpose, please check the Sessions API documentation. You may also omit payment_types entirely, and the Session will support all available payment methods.
Fields description
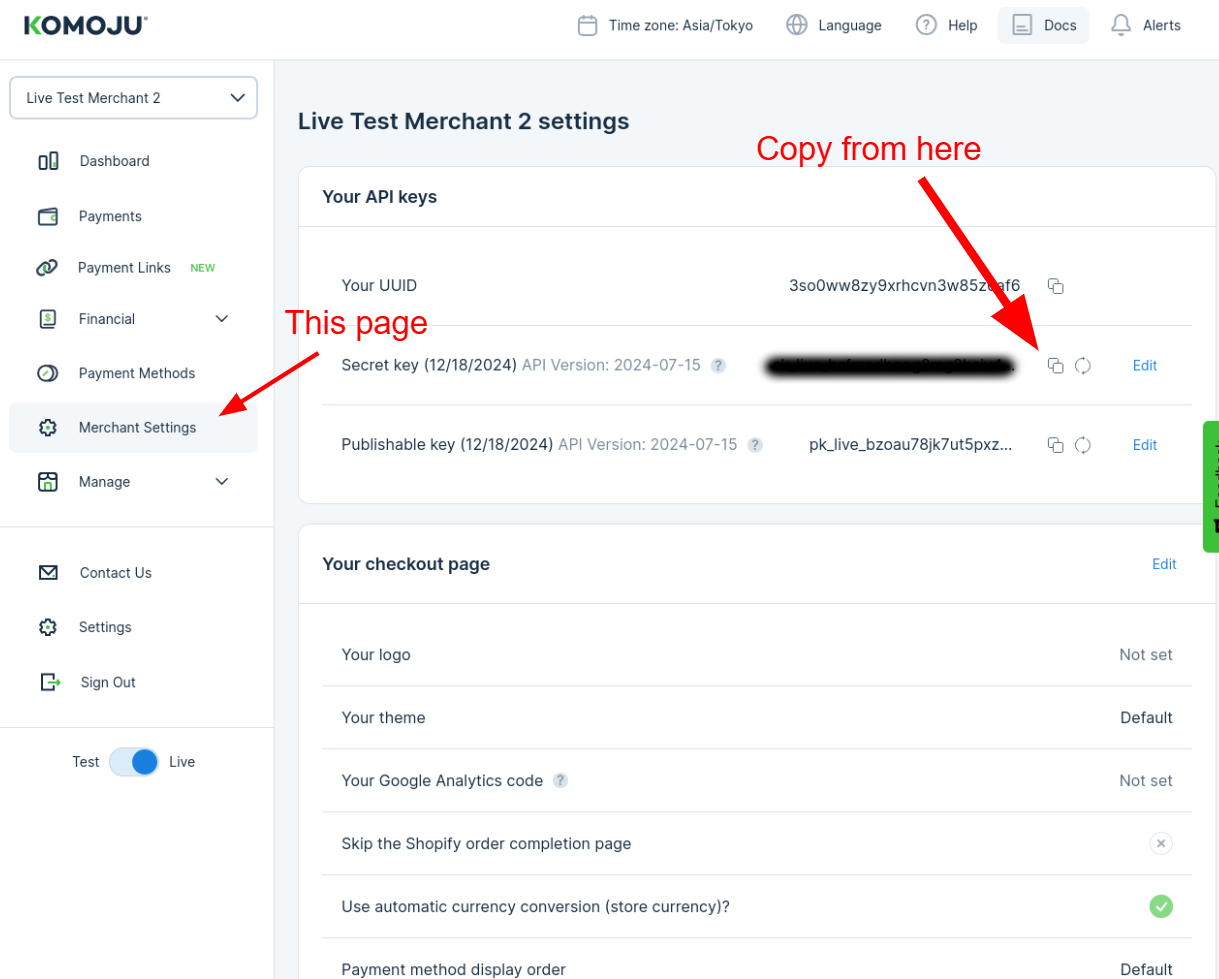
Your secret key
You can get your secret key by logging into your KOMOJU Merchant Dashboard, then clicking on "Merchant Settings".
Payment amount (required)
Pass an integer amount of your desired currency. This is the amount to be charged before tax. The amount must be equal or greater than 0. It is always in lowest denomination of the currency (e.g. cents for USD). For instance, a 1,000 JPY amount would be 1000, but a 100 USD amount would be 10000.
Return URL (recommended)
A URL for the customer to be redirected to when they complete or cancel payment. A description of how this works can be found in Step 3 of this in-depth example.
Customer email (recommended)
If not provided, we will collect this from the customer directly on the payment page.
External order num (optional)
This is a Merchant-side order number. You can use this to store your order numbers on KOMOJU. Alternatively, you may save the KOMOJU-side Session ID in your database for lookup purposes.
Customer address (optional)
If you have the Customer Address, it’s always a good idea to include it in the session creation. It can be used to have better fraud detection (and thus better payment success rate). Some payment methods require this kind of information (for instance, Paidy for physical goods requires a Shipping Address).
Step 2: Redirect Your Customer
The response of the POST /api/v1/sessions request from step 1 contains a session_url. Redirect your customer to this URL to initiate the payment process.
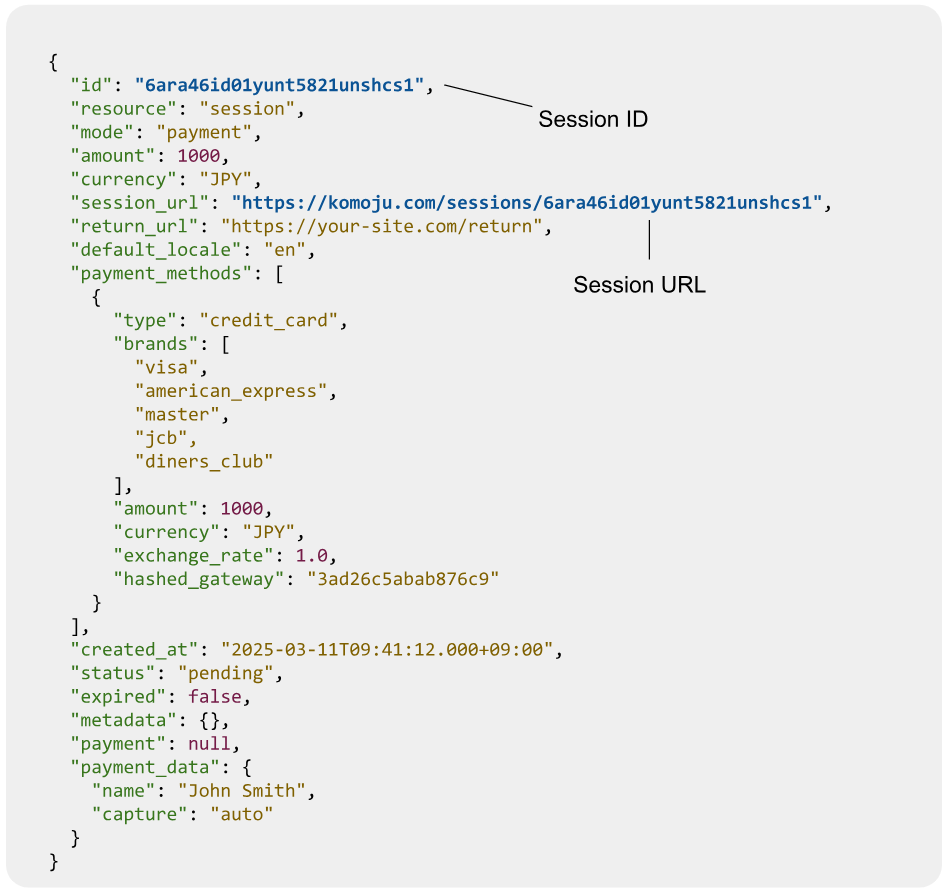
Session ID
This is a unique string that identifies the newly created Session. It may be convenient to save this to your database in case you need to look up the session’s status later on.
Session URL
This is the URL on which your customer can pay for the order. Redirect your customer here.
Step 3: Handle Return URL
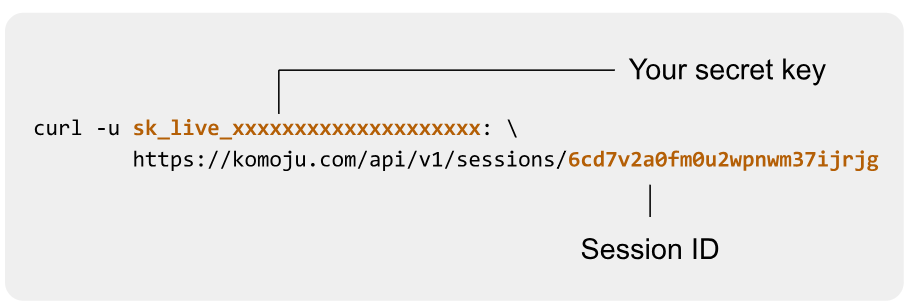
Once the customer is done paying, we will redirect them to the return_url specified in step 1. Before redirecting, KOMOJU will append a session_id query parameter to the URL:
https://your-site.com/return?session_id=6ara46id01yunt5821unshcs1When handling a GET request to this URL, your server should fetch the session to determine payment status. Use the following cURL as a reference.
The response will look similar to the initial Session creation response, except
- The session’s status will be completed, and
- There will be a
paymentobject included in the response. Note that in this case we are authorizing and capturing the credit card payment at the same time, so the payment is captured.
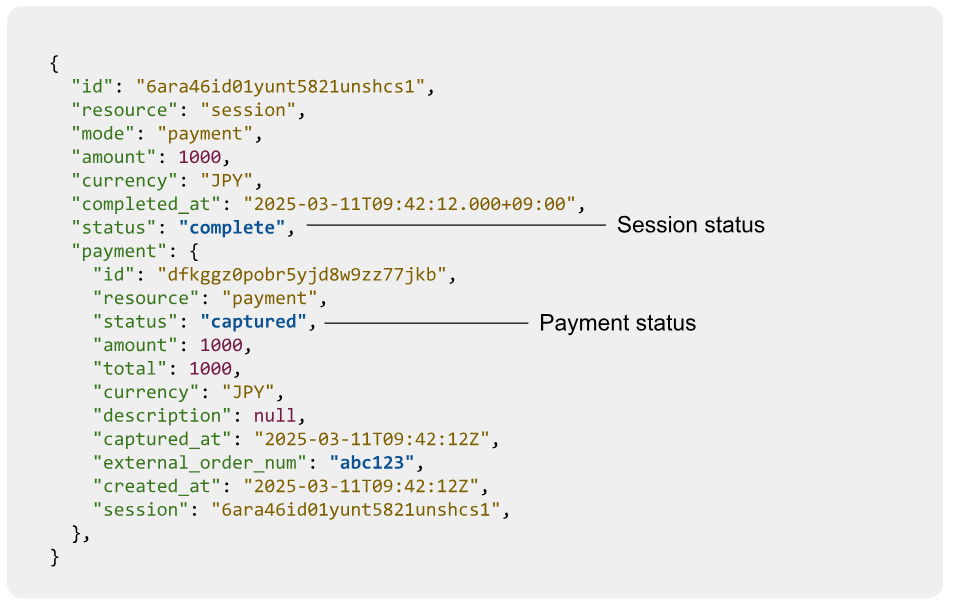
Session status
This will be one of the following:
- "pending": the customer has not paid nor cancelled the session
- "cancelled": the customer cancelled the session
- "complete": the customer filled out the payment form and successfully submitted. A Payment object will be attached to the Session (can be seen in the above example)
Payment status
In our case, this is "captured", as we have set up this credit card payment to be auto-captured. It is possible to set the authorization and capture to be separate, in which case the status would have been "authorized". For some payment methods, such as Konbini, which require the end user to physically go to a Convenience Store to pay, the payment status will be "authorized" until the user pays at the Convenience Store, at which point the payment status would switch to "captured" (and a webhook would be provided for that state change - more on this in the next step).
Step 4: Handle Webhook
It is possible that the redirect in step 3 fails, possibly due to the user closing their browser, network issues, etc. Or, as shown above, that the capture will only take place later on, such as with Convenience Store payments. To account for this, we recommend also creating a webhook to listen for payment capture.
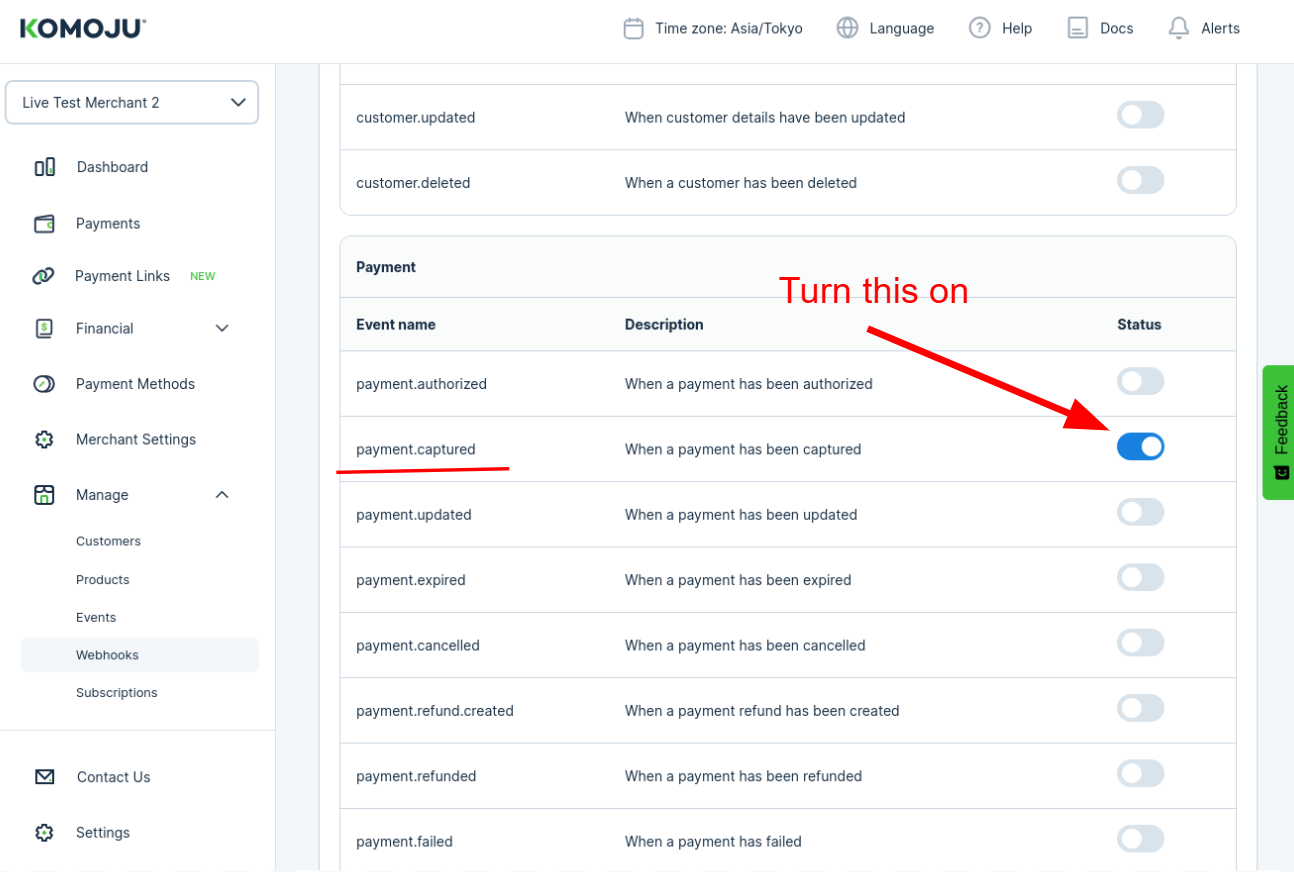
First, set up a new webhook (if you don’t already have one

Next, make sure the payment.captured event is turned on
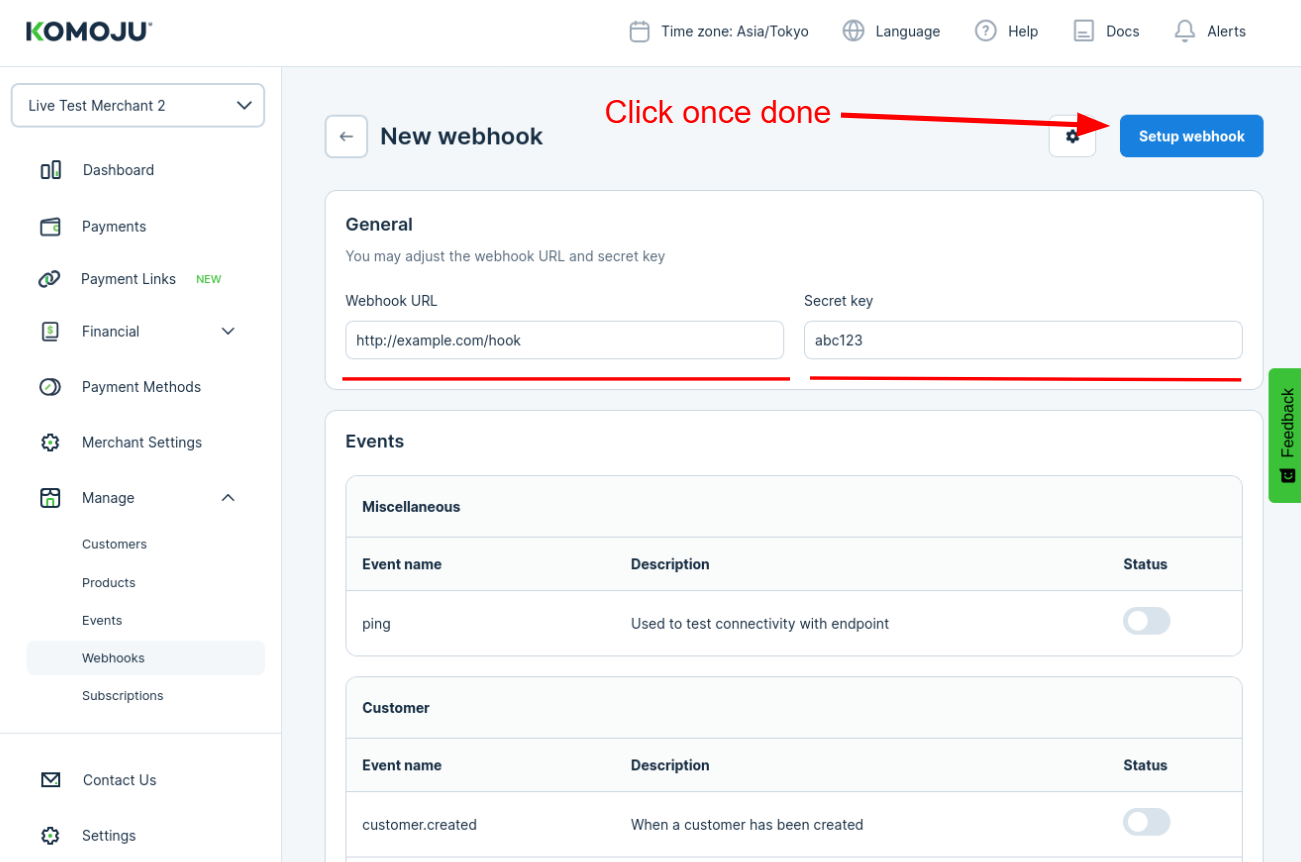
Finally, enter your webhook URL and secret key, then click “Setup webhook”.
Of course, you may also want to set up webhooks for other events, such as payment.updated, payment.expired (to be notified of a Convenience Store payment deadline lapsing, for instance), etc.
Once setup is done, KOMOJU will send a POST request to your Webhook URL whenever a payment gets captured. The post request looks like this:
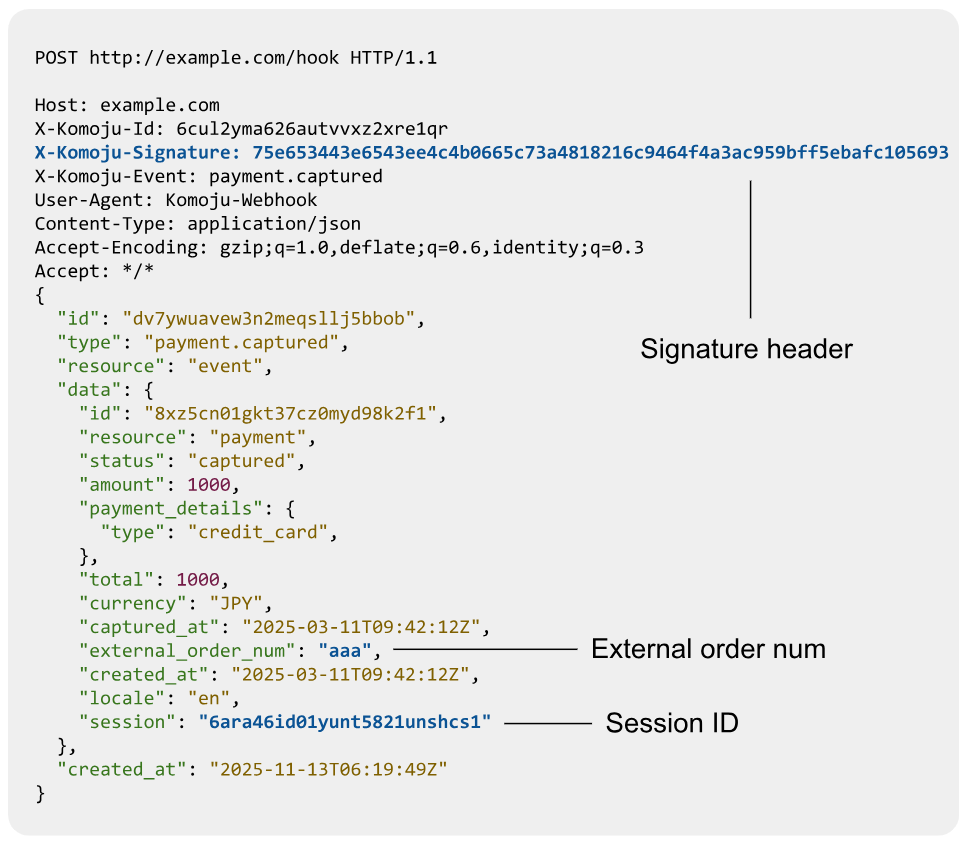
You may use the external order num and/or Session ID to correlate these webhooks with records in your database.
Finally, before trusting the contents of a webhook, you’ll need to verify the signature. Here is some PHP code that performs signature verification:
$WEBHOOK_SECRET = 'abc123'

// NOTE: it’s important to use the raw request body string.
// Try to avoid decoding the JSON and then re-encoding it.

public function validate_hmac($request_body)
{
    $header = $_SERVER['HTTP_X_KOMOJU_SIGNATURE'];
    $computed = hash_hmac('sha256', $request_body, $WEBHOOK_SECRET);
    return $header == $computed;
}
Once done, you may read data.status, data.external_order_num, and data.session before fulfilling your customer's order.
One-Click Payment for Returning Customers
If your website or app has a user login feature, you can allow your users to save payment information for later with minimal integration effort.
If you want to use this feature, please ensure that the following parameters are set when creating a session via the api:
external_customer_id:any valuepayment_types:[credit_card]
Currently One-Click payments are only supported for the credit_card payment type.