
Integration Guide: Standard
The most simple and featureful way to integrate KOMOJU Fields
This is a guide on how to add KOMOJU Fields to your checkout page. In this guide, you provide the full checkout experience, and use KOMOJU Fields for collecting payment right directly on your checkout page.
The overall flow of this integration method is to let Fields do all the work of collecting user input, sending it to KOMOJU, and redirecting the user on success.
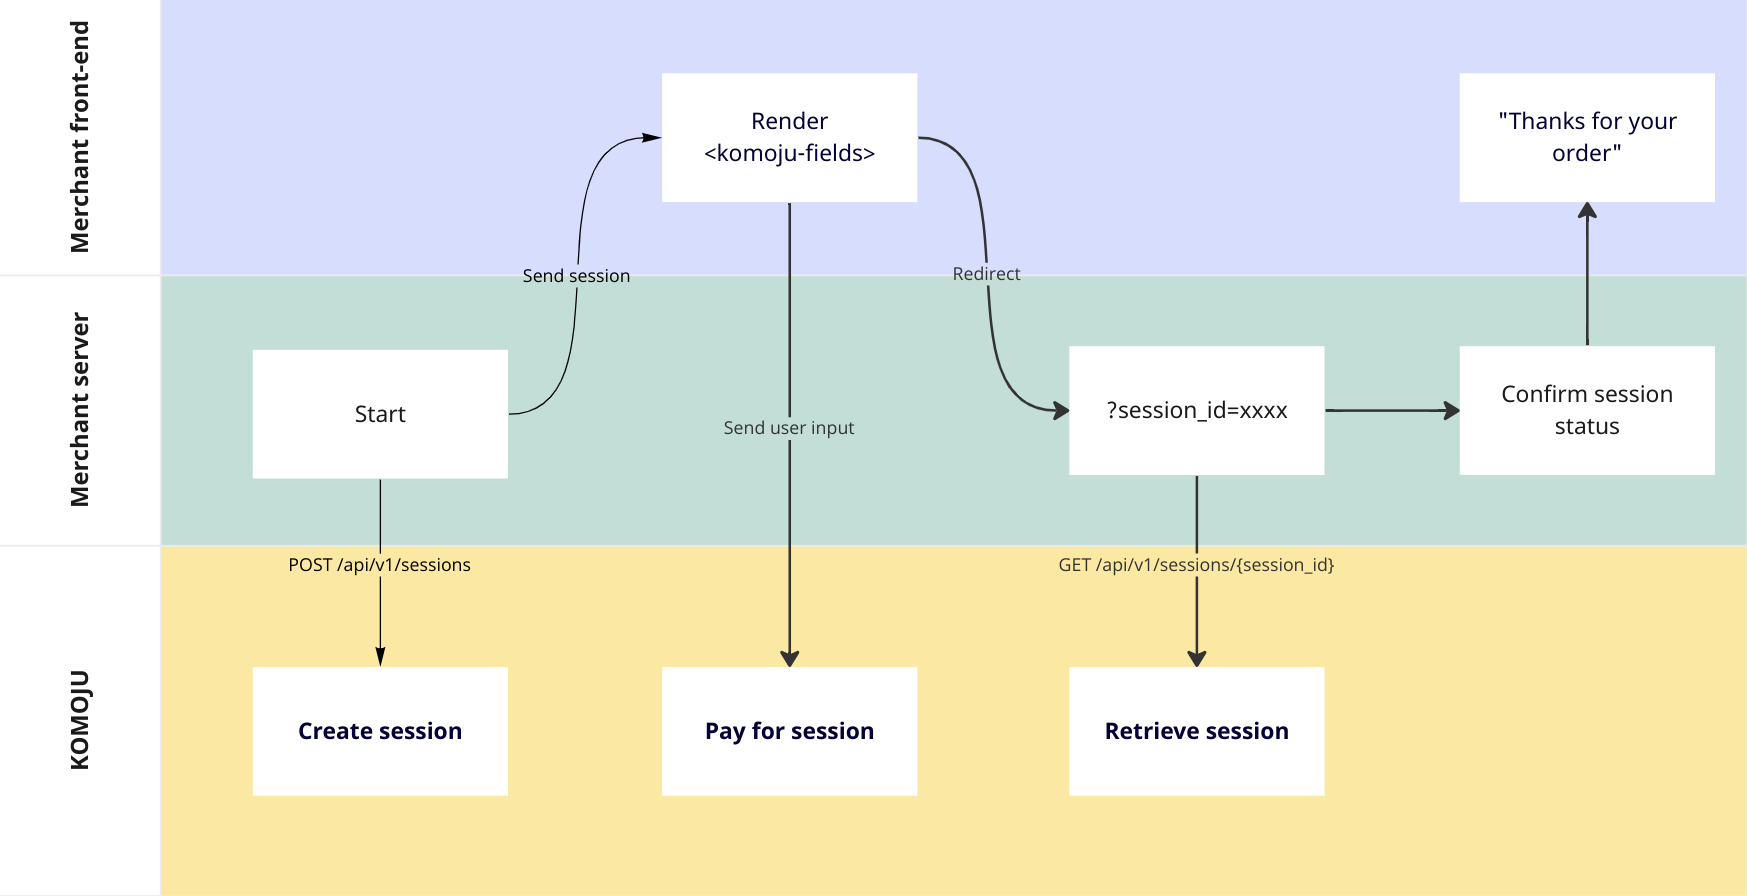
Step 1: create a payment session on backend
Before you can render payment fields, you must create a session with at least an amount and currency.
Save the id field and send it to your frontend.
Step 2: use session ID to render fields on frontend
Once you have your session, you can render payment fields on your frontend.
You'll need 2 pieces of information:
- Your session ID from step 1, and
- Your publishable key from the KOMOJU merchant settings page.
<script type="module" src="https://multipay.komoju.com/fields.js"></script>

<komoju-fields
  session-id={your_session_id}
  publishable-key={your_publishable_key}
></komoju-fields>
Step 3: decide how you want users to submit
There are 2 ways to submit the fields:
- Place your
<komoju-fields>inside of a<form>element, and submit the<form>like normal, OR - Use JS to call
submit()on your<komoju-fields>component:document.querySelector('komoju-fields').submit().
It's important to note that in case 1, your form tag does not actually get submitted. KOMOJU Fields cancels the form's submit event, and directly POSTs the customer's payment details to KOMOJU.
On payment success, the customer will be redirected to your session's redirect_url regardless of whether you submit via form or via submit().